QueueMetrics Users
Default users
The following users come pre-configured in the default database.
| Login | Password | Enabled by default? | Explanation |
|---|---|---|---|
demoadmin |
demo |
Yes |
The sample admin user |
demouser |
demo |
Yes |
The sample CC manager |
demovisitor |
demo |
No |
A sample visitor |
demosupervisor |
demo |
No |
A sample supervisor |
robot |
robot |
No |
A sample robot |
webqloader |
qloader |
No |
Access point for Uniloader |
Agent/101 |
999 |
Ye |
A sample agent |
Agent/102 |
998 |
Yes |
Another sample agent |
Make sure you change their default passwords before letting actual users access QM!
Please note that some users are present but NOT ENABLED by default with the default database schema supplied with QM. You need to enable them manually if you need them.
Password reset
By using Uniloader, it is possible to "lock" a QueueMetrics user so that they must access QueueMetrics through a special link to have their password reset. This way the administrator never knows about the actual password used by the user, that is stored in an encrypted format and not recoverable.
Links have a definite validity (usually 5 days, including the current one) and when they expire, you need to repeat the process again to generate a new one if it was not used before its expiry date.
The procedure is documented in the Uniloader user manual, see section "Password Reset" in chapter "User information".
Using Supervisors
A supervisor, for what QueueMetrics is concerned, is a user holding the key SUPERVISOR. One such user has the ability to be assigned to the known agents as their supervisor and to run a report with the additional criterion of filtering the results for all agents he is the supervisor of. This will work in much the same way as the current Location reporting.
On the main page and on the Custom report analysis, if a user is a Supervisor, he will have an additional option: "Run the analysis for my competency". This option will at the moment be mutually incompatible with Location filtering (if both are chosen, an error will be shown). The analysis will proceed as usual.
In the real-time page there will be a new toggle button "Competency" to filter agents by the competency. Even in this case the filter may not be used together with Location filtering.
| For security reasons, this user must be manually enabled in the standard database. |
Using an external auth source for QueueMetrics
QueueMetrics can accept an external authentication source. By using a simple JSON/XML-RPC/LDAP interface, it is possible to write third party scripts that are able to authenticate against a chosen authentication system (e.g. Kerberos, Microsoft Active Directory, a Microsoft domain server, etc).
Overview
When an user logs in to QueueMetrics, QM checks to see if there is an auth source defined. QueueMetrics will execute a query to that third-party server passing along the user-id and the password given for authentication, plus a given service-id that will be defined in the configuration file.
The server will respond passing along a fixed set of data:
-
An auth response (see below)
-
A set of login information for that user (e.g. real name, email, and possibly a different log-in)
-
The current class and user keys for that user
If the class passed along is empty, only the user keys will be computed. If the class is not empty, it will be searched by name on the QueueMetrics storage and it will be loaded. Trying to load a non-existent class will result in auth failure.
The auth server may return four different responses:
-
S: Access successful allowed -
A: Access allowed with supplied user data -
F: Access is forbidden -
D: Access is fully delegated to QM
The following table explains the relationship between those states:
| Auth OK | Auth KO | |
|---|---|---|
User data on auth server |
AUTHORITATIVE |
FORBIDDEN |
User data on QM |
SUCCESSFUL |
DELEGATED |
If auth is SUCCESSFUL, the local QM database is checked for that user name. If such a user is present, the user details, class and key information are loaded from QM. If such a user is not present, the details are taken from the ones supplied by the service.
If auth is AUTHORITATIVE, the details are taken from the ones supplied via RPC. Then they are copied to the local user database (with a random password) so that although the user cannot login manually, it is possible to decode the user name for all logged operations (e.g. Updating a queue). If a user with the same name is present, credentials are forcibly updated with the authoritative credentials.
The following values are implied in authoritative replies:
-
Enabled = yes
-
Masterkey = no
The actual user data sent by the auth server is only read by QM in case "A"; otherwise it’s ignored, whatever is passed.
If auth is FORBIDDEN, no other check is done and the user is rejected access.
If auth is DELEGATED, the standard QM logon procedure is done; so the remote auth source is basically telling QM to repeat the log-on process as if there was no external auth involved. This way, you can first check on the remote system, and you delegate any failing user to QM, so you can have a mix-and-match situation. Some drivers let you input a list of ignored users that are in any case delegated, effectively bypassing them.
The whole procedure is totally transparent to the user, so they do not need to know which is the authority that grants or denies access.
Driver: JSON
By setting the properties:
auth.externalSource=json
auth.verboseLog=true
default.authSystemId=sys1

auth.jsonServerUrl=https://myserver.....
auth.jsonPost=false
auth.jsonIgnoreUsers=webqloader,robot
A request will be sent to the URL specified, with a JSON payload in parameter query, as below:
{
  "login" : "demoadmin",
  "password" : "password",
  "systemId" : "sys1"
}
The result must have the following shape:
{
    "response": "A",
    "login": "demoadmin",
    "realname": "John Doe",
    "email": "john@home",
    "classname": "AGENTS",
    "keys": "A B C"
}
In the case of "A" (Authoritative) you need to fill all parameters, while in all other cases the response will be enough.
If there is a login field in the reply, then the returned login will be used on QM - this is espeecially useful for agents, where QM demands a format like Agent/123 while you might use a free form, and return the correct agent code if authentication is successful.
The ignore parameter is useful for JSON services / web loading, to avoid hitting the server on each request, or if you don’t want to have QM-specific users on your server (eg. a company’s LDAP server you don’t manage).
| You can test JSON auth by using ready-made answers, so you don’t have to write a server yourself - see in: https://github.com/Loway/OpenQueueMetricsAddOns/tree/master/json-auth-examples |
Driver: LDAP
The LDAP driver lets you query an external LDAP/LDAPS server; you define both the server and the user query to be checked.
auth.externalSource=ldap
auth.verboseLog=true
default.authSystemId=sys1

auth.ldapServerUrl=ldap://ldap.forumsys.com:389
auth.ldapBind=cn=${login},dc=example,dc=com
auth.ldapFailureDelegates=true

auth.ldapLoginAttr=msDS-cloudExtensionAttribute7
auth.ldapBase=CN=Users,dc=example,dc=com
auth.ldapQuery=(sAMAccountName=${login})

auth.ldapIgnoreUsers=webqloader,robot
All strings can be expanded with the following placeholders:
-
login: the login string enter by the user in QM -
password -
systemid: theauthSystemId
The ldapBind parameter is the log-in that lets your user access LDAP;
it is usually the Distinguished Name (e.g. CN=John Doe,CN=Users,DC=example,DC=com) or the Account Name
or the user’s e-mail, depending on system configuration.
LDAP can be used in two ways:
-
you use the same log-ins in QM and LDAP; in this case you only need to set the
ldapBindparameter to your "login" -
you cannot use the same log-ins in QM and LDAP, e.g. because users have a company-wide LDAP policy set, and you have no control over their names and logins. This may be a problem for agents, where QM needs the
Agent/101format that matches their extension.
In this second case you need to specify an attribute on your users to contain the login
that will be used in QM for them. In ActiveDirectory, for example, the default schema has a
set of empty Extension Attributes that may be set freely. They do appear in LDAP with a name like msDS-cloudExtensionAttribute7. In one of them, you should specify the QM login to use.
To use them, you need to set ldapLoginAttr to the attribute to use, the ldapBase to
where to start searching in the LDAP tree (typically, Users), and a LDAP query that is supposed
to return only one record that finds the right user on the basis of the user-supplied login.
Missing attributes, users, or multiple results will be logged on the system log.
At the end of your LDAP authentication, the only positive auth will be SUCCESS - so a user with the same name is supposed to be present in the database.
If the auth fails, we check auth.ldapFailureDelegates: if true, auth fails with DELEGATES; if false, as by default, it is FORBIDDEN.
As for JSON, it is possible to have a set of users that are ignored for LDAP and effectively checked only on the local database; this is helpful for webservices or data loaders, especially when you cannot create service users in LDAP for third-party applications.
To get started with LDAP, you will need a tool to access it, as names and attributes are
different on different systems. A tool like ldapsearch, available on most Linux systems,
will let you test binding parameters from the command line; once they work, you can
start configuring it in QM.
|
Using Single Sign-On with QueueMetrics
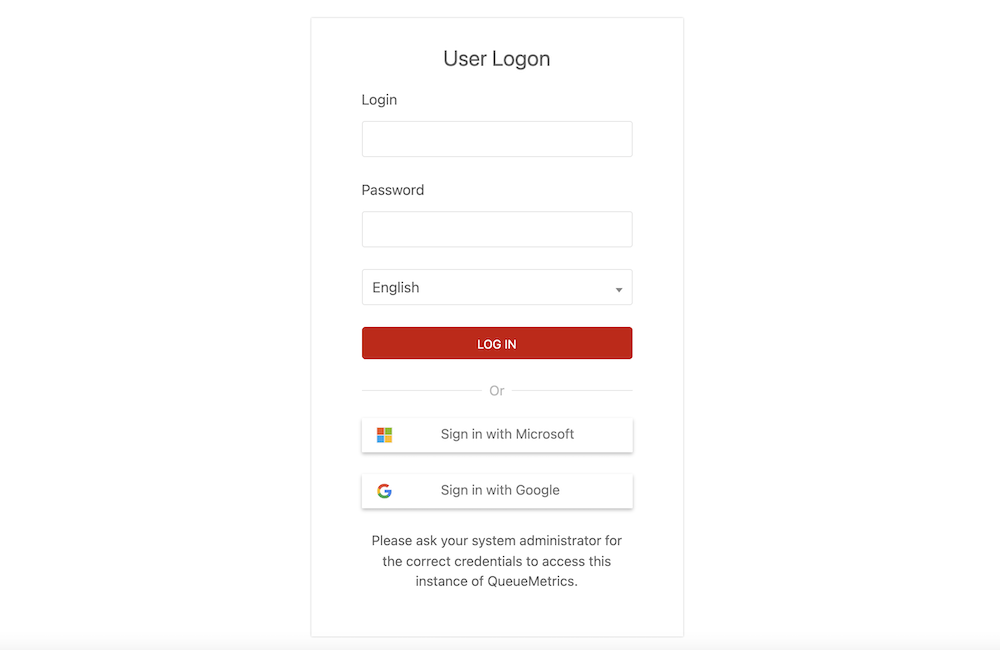
QueueMetrics is compatible with some Single Sign-On (SSO) providers that are based on OAuth2, and can offer a very simple SSO flow where the QueueMetrics user can just click on the right button to authenticate.
So, when an user clicks on the provider’s button, they are asked for consent to allow log-in to QueueMetrics; from them on, if they are logged on to the provider, the just click on the button and find themselves within QueueMetrics.
Overview
Prerequisites
-
A system administrator creates an application in the OAuth provider of choice. QueueMetrics will act on behalf of this application to authenticate users. The QM instance will not share any data with Loway.
-
A system administrator enables one or more OAuth drivers in QM by setting some configuration properties.
-
The QM server has internet HTTP/S connectivity towards the required auth source
-
The end-user who needs to log-in has direct HTTP/S connectivity towards the required auth source
-
QM is served through HTTPS
Flow
-
A system with OAuth enabled will display the familiar (say) "Sign-in with Google" button below the main login form in QM, depending on which driver(s) are active.
-
When a user wants to use an OAuth source, they click on the button and are sent to a transaction where the user consent is gathered to share data with the application (and QM running it). Data to be shared is the current user’s email and name. If the user is already logged on the platform and has already given consent, no manual action has to be performed.
-
If the user consents, then a secure token is returned to QM:
-
QM will then issue a request to the service, using the secure token, to read the user’s profile: user-name, unique identifier and email
-
If an existing user with the same email is present in the QM database, and is flagged for OAuth access, and is enabled, then that user’s profile will be used for log-in and its password will be ignored.
-
If a user with the same email exists, but the user is not flagged for OAuth access or is not enabled, then login will be refused as if the user was blocked
-
If no user with that email address is present, a user is created in a placeholder class, so that its name, email and unique-id will be created on the database. They won’t be able to log anyway in until an administrator approves them. See Creating users.
-
-
If the user does not consent, or the login procedure fails on othe OAuth provider for any other reason, then a log is written and the user goes back to the login page
-
Ordinary users will co-exist, and they will log in normally from the login form. If an external auth source (LDAP, JSON…) is set, it will be used normally.
In practice: a Google flow
-
Alice Doe is an agent in QM, where she is known as
Agent/103. She has an account on Google asalice@compa.ny -
She clicks on the Google button, and goes to a consent form. On the consent form she will see the name of her company, as that name was set up in the application in Google. She logs in with her email and password as she usually does.
-
If all goes well, QM is returned a secure token
-
QM queries her Google profile via API (therefore asserting that the token is indeed what is is supposed to be), and finds out that her full name is "Alice Doe", her email is "alice@compa.ny" and her Google ID is "123456"
-
QM goes looking for a user which email field is set to
alice@compa.nyand who has the token field set togoogle:123456in their profile:-
QM finds such a user; their id happens to be
Agent/103; at this point a full login is performed and Alice sees herself logged in asAgent/103 -
QM does not find such a user: then it will create a new user
Alice.Doe, with emailalice@compa.ny, and flaggoogle:123456in a designated class. User will be displayed an error stating that log-in is not possible.
-
Why flagging users for access through the token field
The format of log-ins for agents in QM is constrained; Agent/103 will work but John.Doe won’t. That’s why QM uses the email address as a pivot to find the right user to log in. This is turn causes a possible security issue - if you have alice@compa.ny and create a second account with the same e-mail on a different provider, then you would be able to log-in with a different set of credentials.
QM instead validates the presence of a token google:12345 or microsoft:12345 so that we can assert that:
-
Only that driver can be used for logging in
-
The correct provider-id is used (unless you user e.g.
google:*to allow any Google account) -
Multiple assertions may be present, e.g.
google:* microsoft:*
Creating users for SSO
To enable a QM user to log in with SSO:
-
you set their email address to the one returned by the SSO provider,
-
and set their
tokenfield to the correct value, e.g.google:*
As this is sometimes unwieldy, you can have QM automatically create a template user when someone accesses QM through SSO.
Automatic creation of foreign users
To create a new user, the sysadmins must know not only the email, but also the service and possibly the exact reference id for the user in the exact auth provider.
To make their life easier, we automatically create unknown users into a placeholder class, usually AGENTS. Therefore in the example above, to enable Alice for proper access, the sysadmin will only have to change her class and possibly the log-in name (for agents), but the full name and the identity assertions will already be present.
When a user tries to log in with a user that is correct on the OAuth side but does not exist in QM:
-
If a placeholder class is set in the configuration:
-
A user is created in QM with:
-
its log-in is set as
Agent/plus the name of their e-mail account -
its E-mail and Full name set as specified by the OAuth provider
-
its password is set to an invalid value
-
the user is in any case set as blocked, so that it is impossible to log in
-
the user is pre-set with the correct service token, e.g.
google:12345
-
-
The user is shown an error message that specifies that the log-on is not possible.
-
An administrator will have to approve the user by unblocking her and (optionally) assigning it to the right class.
-
If a user with the same login is already present, then no new user is created.
-
-
If no placeholder class is set, the login simply fails.
| The administrator needs to manually unlock any such user, after editing their profile - for example by assigning them to the correct class or modifying their login. Just make sure that the email and token fields are left unaltered. |
Security considerations
An OAuth user exist on the QM database, but cannot be used for log ins as their password is invalid. Therefore, if a user has the grants to set their own password they can bypass the OAuth flow entirely. Therefore we strongly recommend removing the key CHPASSWD before allowing direct log-ins.
On the other hand, this can be used by an administrator in an emergency where the OAuth server is unavailable to allow access to QM by setting ad-hoc passwords and changing them after the event.
It is strongly advisable to keep at least an admin user as QM-only to allow emergency access in case the OAuth service should be unavailable.
Logging
The following items are logged on the Audit logs:
-
OAuth consent obtained (before authentication is done, so it could still fail)
-
OAuth consent failed (if the provider can signal it)
-
OAuth profile access failed
-
User locked out / missing grants
-
New user created from OAuth
Limitations
As OAuth users depend on human interaction, such users won’t work for webservices (unless a password is set). This is not a major limitation, as you would usually create local users for webservice acces.
OAuth users can be instead users to run scheduled reports, as QM impersonates them without the need of password authentication.
The return URL
In order to "jump back" from the auth flow, QM creates a return URL, that is basically the public name of the server QM instance plus the string "/qm_sso_return.do": for example, it might be https://test.loway.ch:443/queuemetrics/qm_sso_return.do.
As most SSO providers will require this to be an HTTPS URL, QM rebuils the public name based on the headers it receives from its upstream proxy implementing HTTPS, e.g. NGINX.
To see the current URL, as an administrator, go to "Diagnostics" → "View configuration" → "HTTP Configuration" and check the value that appears in "Q: getPublicQmBaseUrl".
SSO drivers: Google
The driver is called google, and will work in the case you use Google to manage your
organization’s credentials.
Creating credentials
First you need to log in to Google Cloud Platform, select "Console" and create a new project (usually by selecting the "Projects" drop down).
-
Project name: anything you want
-
Organization and Location: your organization
Now select your new project, and select "APIs and Services";
-
first select "OAuth consent screen" and select Internal. Then enter the App name - that is what your users will see as the entity requesting access - and upload a logo. The go to "Scopes" and do not add anything. Terminte the transaction.
-
then click on "Credentials", "Create Credentials", select "OAuth Client Id", and select type "Web application". Now add an "Authorized redirect URI", as
https://my.server.x/queuemetrics/qm_sso_return.do- it must be the full HTTPS name of your QM instance plusqm_sso_return.do -
once the client is created, you will be prompted to download a JSON file. Do not lose it! it contains the credentials you need to access
Configuring QueueMetrics
First, take the values from client_id and client_secret from the JSON file you downloaded,
and set your configuration.properties like:
sso.driver=google
sso.placeholderClass=AGENTS
sso.verbose=false

sso.google.clientId=XXXXXXX.apps.googleusercontent.com
sso.google.clientSecret=GOCSPX-xxxxxxxxxxxxxxxxxxxxxxxxxxxxx
Now restart QM and the home page will present a new Google button. By clicking on it, you can gather user consent and a new user will be created in QM. You can then unlock this user, change the login as needed, and have them log in again.
SSO drivers: Microsoft
The driver is called microsoft, and will work in the case you use Microsoft (e.g. Teams) to manage your
organization’s credentials.
Creating credentials
Log in into the Azure portal, click on "App registrations", click on "New registration".
-
As
Nameenter the name you want to show in Azure -
For "Supported account types" select "Accounts in any organizational directory (Any Azure AD directory - Multitenant)"
-
For "Redirect URI", select type "Web" and add
https://my.server.x/queuemetrics/qm_sso_return.do- it must be the full HTTPS name of your QM instance plusqm_sso_return.do -
Now click on "Register"; you will be driven to the newly created app
-
Now click on "Certificates and secrets", select "Client secrets", then click on "New client secrets", add a name and a duration, and a new secret will be created for you. You can now copy the "Value" and paste it somewhere, but just once, so store it securely.
-
Now go to "Authentication", find "Implicit grant and hybrid flows" and check both "Access tokens (used for implicit flows)" and "ID tokens (used for implicit and hybrid flows)", and make sure that "Supported account types" is set to "Multitenant".
-
If you want, from "Branding and properties" you can set up a consent screen with your logos.
Configuring QueueMetrics
You will need the Application ID and the Tenant/Directory ID that you can find on the home page of the app you just created, plus the secret.
sso.driver=microsoft
sso.placeholderClass=AGENTS
sso.verbose=false

sso.microsoft.applicationId=xxxxxxxx-xxxx-xxxx-xxxx-xxxxxxxxxxxx
sso.microsoft.tenantId=yyyyyyyy-yyyy-yyyy-yyyy-yyyyyyyyyyyy
sso.microsoft.password=xxxxx~xxxxxxxxxxxxxxxxxxxxxxx.xxxxxxx
Now restart QM and the home page will present a new Microsoft button. By clicking on it, you can gather user consent and a new user will be created in QM. You can then unlock this user, change the login as needed, and have them log in again.
Automating statistics download: the ROBOT profile
It is sometimes desirable to obtain a snapshot of the reports QueueMetrics produces at a given moment in time for future access or for uniformity of comparison. You may, for example, want to store on disk a snapshot of the current daily activity every day at 19.00, fur future reference.
The ROBOT profile was thought for this purpose: automating access to the wealth of statistics that QueueMetrics is able to provide.
To set this up, first make sure that you have at least one user holding the key ROBOT that is used for remote access. A sample user called robot password robot is provided in the sample database that ships with QueueMetrics.
| For security reasons, this user is present in the default database but it must be manually enabled. |
Point your browser to the QueueMetrics server with a URL like the following:
http://server/queuemetrics/qm_rep.do?user=robot&pass=robot&queues=q1&period=t0
will download today’s report - the full version - for queue "q1", while the following one
http://server/queuemetrics/qm_rt.do?user=robot&pass=robot&queues=q1|q2
or, for the ajax based page version
http://server/queuemetrics/qm_rt_ajax.do?user=robot&pass=robot&queues=q1|q2
will download the realtime page for queues "q1" and "q2", and
http://server/queuemetrics/qm_wab.do?user=robot&pass=robot&queues=q1|q2
or, for the ajax based page version
http://server/queuemetrics/qm_wab_ajax.do?user=robot&pass=robot&queues=q1|q2
will download the realtime wallboard for queues "q1" and "q2".
It is then easy to automate this behaviour using an automated downloader, like for example the wget command in the Unix environment.
The following web parameters are accepted by the qm_rt (realtime page) and qm_rep (report page) generators:
| Parameter | Notes | WAB | RT | REP |
|---|---|---|---|---|
user |
The user name. Mandatory. |
X |
X |
X |
pass |
The user password. Mandatory. |
X |
X |
X |
logfile |
The log file to use ( with full path). If not defined, the default one will be used. |
X |
X |
X |
queues |
One or more queues to be analyzed. Use the pipe symbol to separate multiple entries. Use the Asterisk name for each queue. |
X |
X |
X |
reportname |
The wanted dynamic report name. If this parameter is not specified, the default report will be shown. If the report name contains special characters, they should be properly encoded (for example with %20 for spaces) |
X |
||
period |
The time period to use. Composed by a single letter plus the number of days to report about. t0: today - t1: yesterday d1: last 24hrs - d2: last 48 hrs |
X |
||
filter |
A single agent’s name, like Agent/123, that will be used a s a filter for the analysis. |
X |
||
t_from |
Initial time, expressed in the format yyyy-MM-dd.HH:mm:ss, e.g. 2006-01-03.12:00:00. |
X |
||
t_to |
Ending time, expressed in the format yyyy-MM-dd.HH:mm:ss, e.g. 2006-02-04.03:00:00. |
X |
||
reloads |
Always set to 1 if the session is to generate a reloadable page. Do not use for general report extraction. |
X |
X |
If you run a report, a time interval must be specified, i.e. you have to supply either a "period" or a "t_from"/"t_to" couple.
In addition to the key ROBOT, your user will need the key QUEUE_AN for reporting and REALTIME for realtime monitoring.
Generate PDF and XLS reports and send them by e-mail
| The information here is obsolete - see Scheduled jobs instead. |
By using the ROBOT profile is possible to generate PDF and XLS reports and send them to a list of e-mail recipients. The report parameters, like queue, period, report set and the list of recipients should have been already defined in the Report ExportConfiguration pages.
| To generate the PDF and XLS reports the ROBOT user should hold the USR_REPORTS_EXPORT key and all optional security keys assigned to each export job. |
You will usually run these jobs automatically by setting up a Scheduled job, though you can have reports generated on-demand by downloading the following URL (you will probably use wget or a similar tool, and will script this as a cron job so that it will be run daily or weekly):
http://server:8080/queuemetrics/qm_export_stats_run.do?username=robot&password=robot&exportId=X
where the exportId X parameter is the job number identifier that could be found on the Report ExportConfiguration pages.
The server generates the required report and send it to a list of recipients. It also returns a copy of the generated document.
If you don’t want QueueMetrics to send e-mails but just need to retrieve the file, avoid configuring any e-mail recipients.
If there is an error during the document generation or e-mail sending phase, then an error message is returned instead.
| Please note that the some configuration settings are required for QueueMetrics when sending e-mails. Further details could be found on the System Preferences. We suggest turning on SMTP debug when sending your first e-mails to understand what is going on, or use the SMTP debug page at SMTP test . |
| As QueueMetrics has no way to know which language you want to use for the report, and the character set to use in it, make sure that you set the parameters 'default.language' and 'default.country' to the correct values. |
Setting up a self-service wallboard
| The information here is obsolete - see Running a wallboard in kiosk mode instead. |
By using the ROBOT profile in conjunction with reloads=1, it is quite simple to set-up an unattended wallboard for QueueMetrics.
First of all set up a low-cost Linux box to boot in its graphical environment, automatically launch a web browser and go to the following URL:
http://server/queuemetrics/qm_wab.do?user=robot&pass=xxx&reloads=1&queues=q1|q2
or, for the ajax based page version
http://server/queuemetrics/qm_wab_ajax.do?user=robot&pass=xxx&reloads=1&queues=q1|q2
This command will show an auto-reloading wallboard showing the real-time status of queues Q1 and Q2.
If you connect the new Linux box to a large screen or a video beamer and set it in your call-center where it will be visible by your agents, you have just set-up a wallboard at a very low cost using commodity hardware and requiring no human intervention but turning it on in the morning and turning it off in the afternoon.
You can do the same with the real-time screen by using the qm_rt.do or the qm_rt_ajax.do commands to create a very simple real-time monitor running all day long for your supervisors.
| Please note that there is a difference between results produced by the XML rpc realtime calls and the realtime statistics produced through the QueueMetrics GUI when the key realtime.members_only is equal to true. The difference is related to the agents list shown. Being the list of queues, in the XML-RPC call, specified by a list of names instead of a list of queue unique identifiers, is not possible to correctly identify elementary queues from macro queues having the same name. In this situation the agent list will always be calculated as sum of all agents associated to all elementary queues composing the macro queue, even if the macro queue has directly assigned agent. |