Agent page
QueueMetrics 23.09 introduces a new Agent Interface from where Agents can control their presence on Queues, and handle every aspect of their workflow, directly from QueueMetrics.
If you are currently running the Icon agent page, you can control
which agents get which page by adding or removing the visibility key NEWAGENTPAGE that, when present,
enables Icon for the agent. By removing it altogether from the AGENTS class,
all of your agents will use the new page.
Login
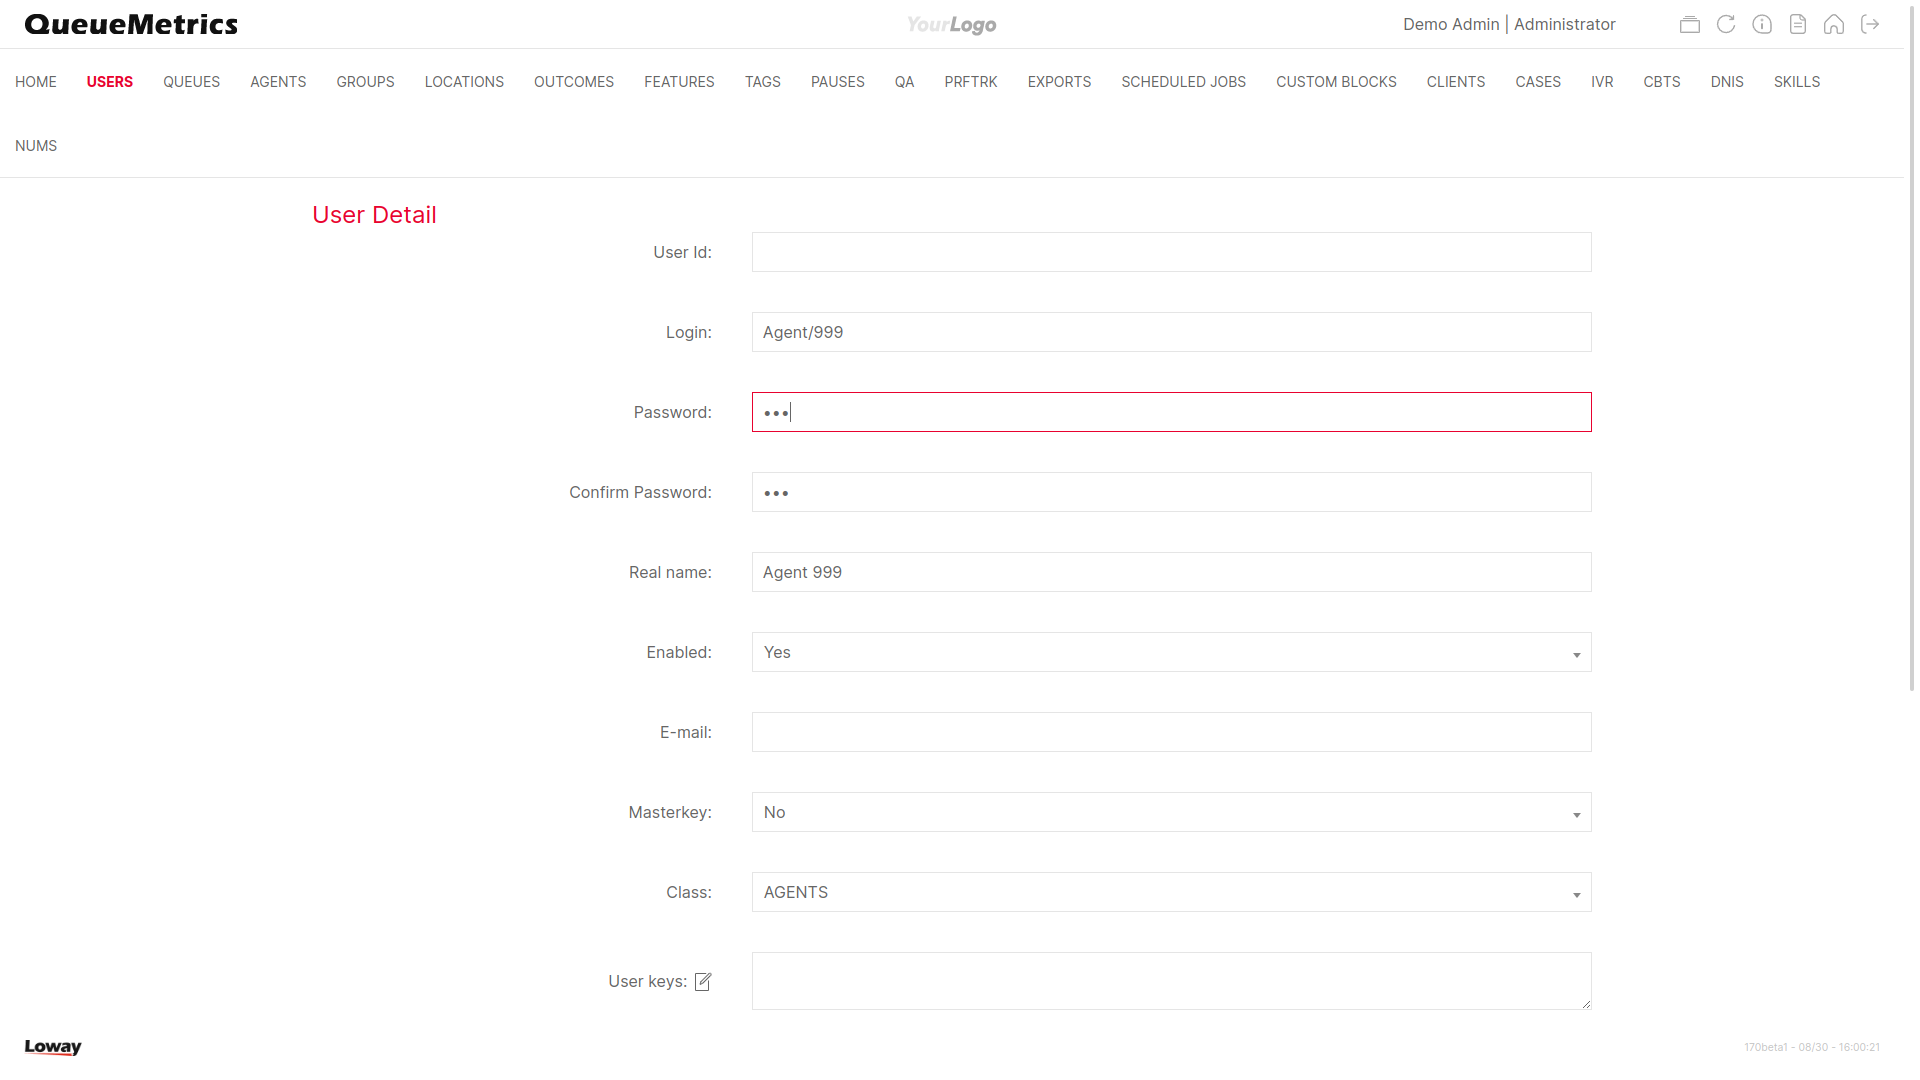
To login into the Agent Page, you will need to configure an Agent User in QueueMetrics. In order to do this, please create an Agent and a User, both with the same Agent Code.
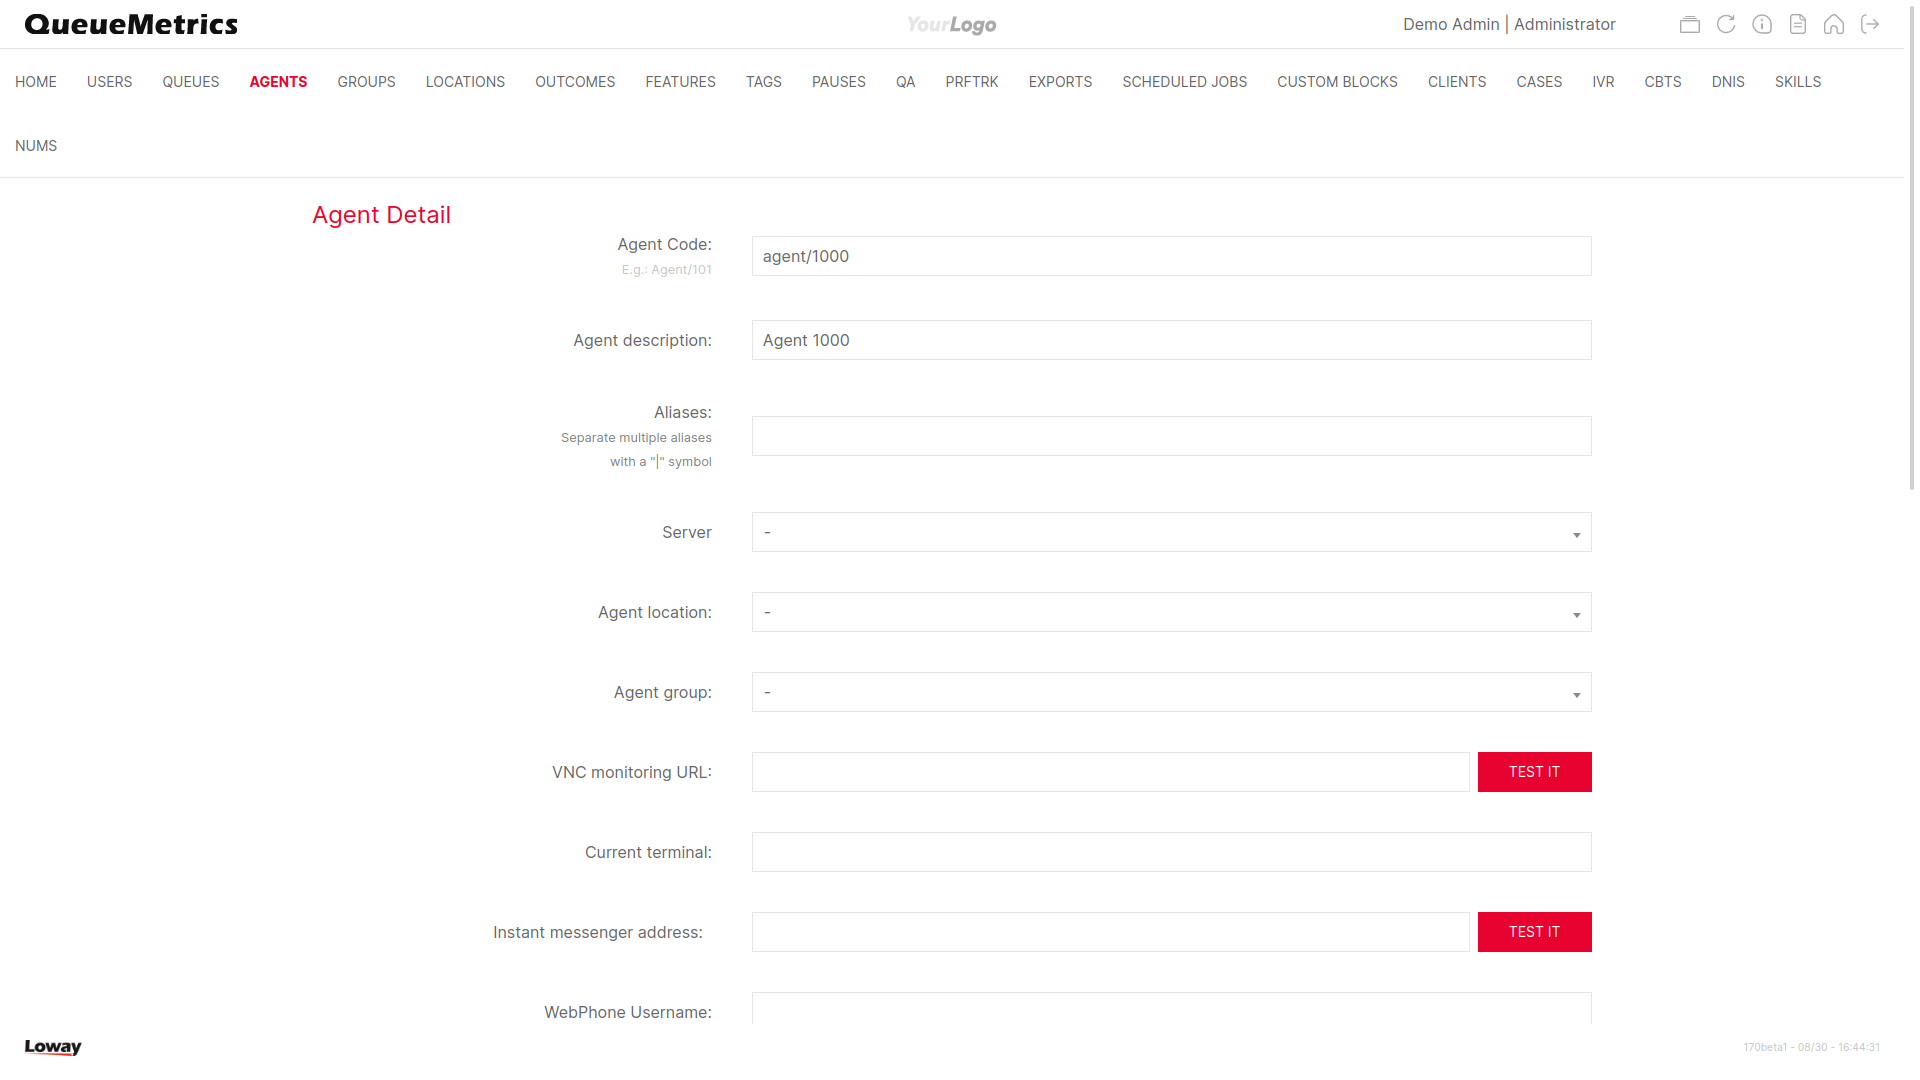
Remember to make sure that the User class for this User is AGENTS, and that it does not contain the key NEWAGENTPAGE.
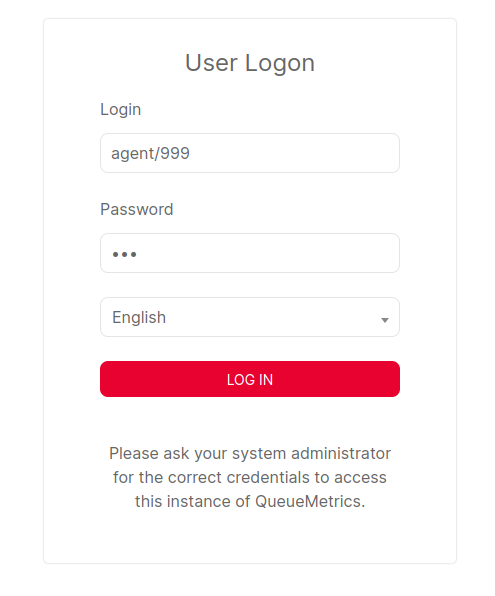
Once you have created the Agent and User, please log out and log into QueueMetrics using your new credentials.
Overview
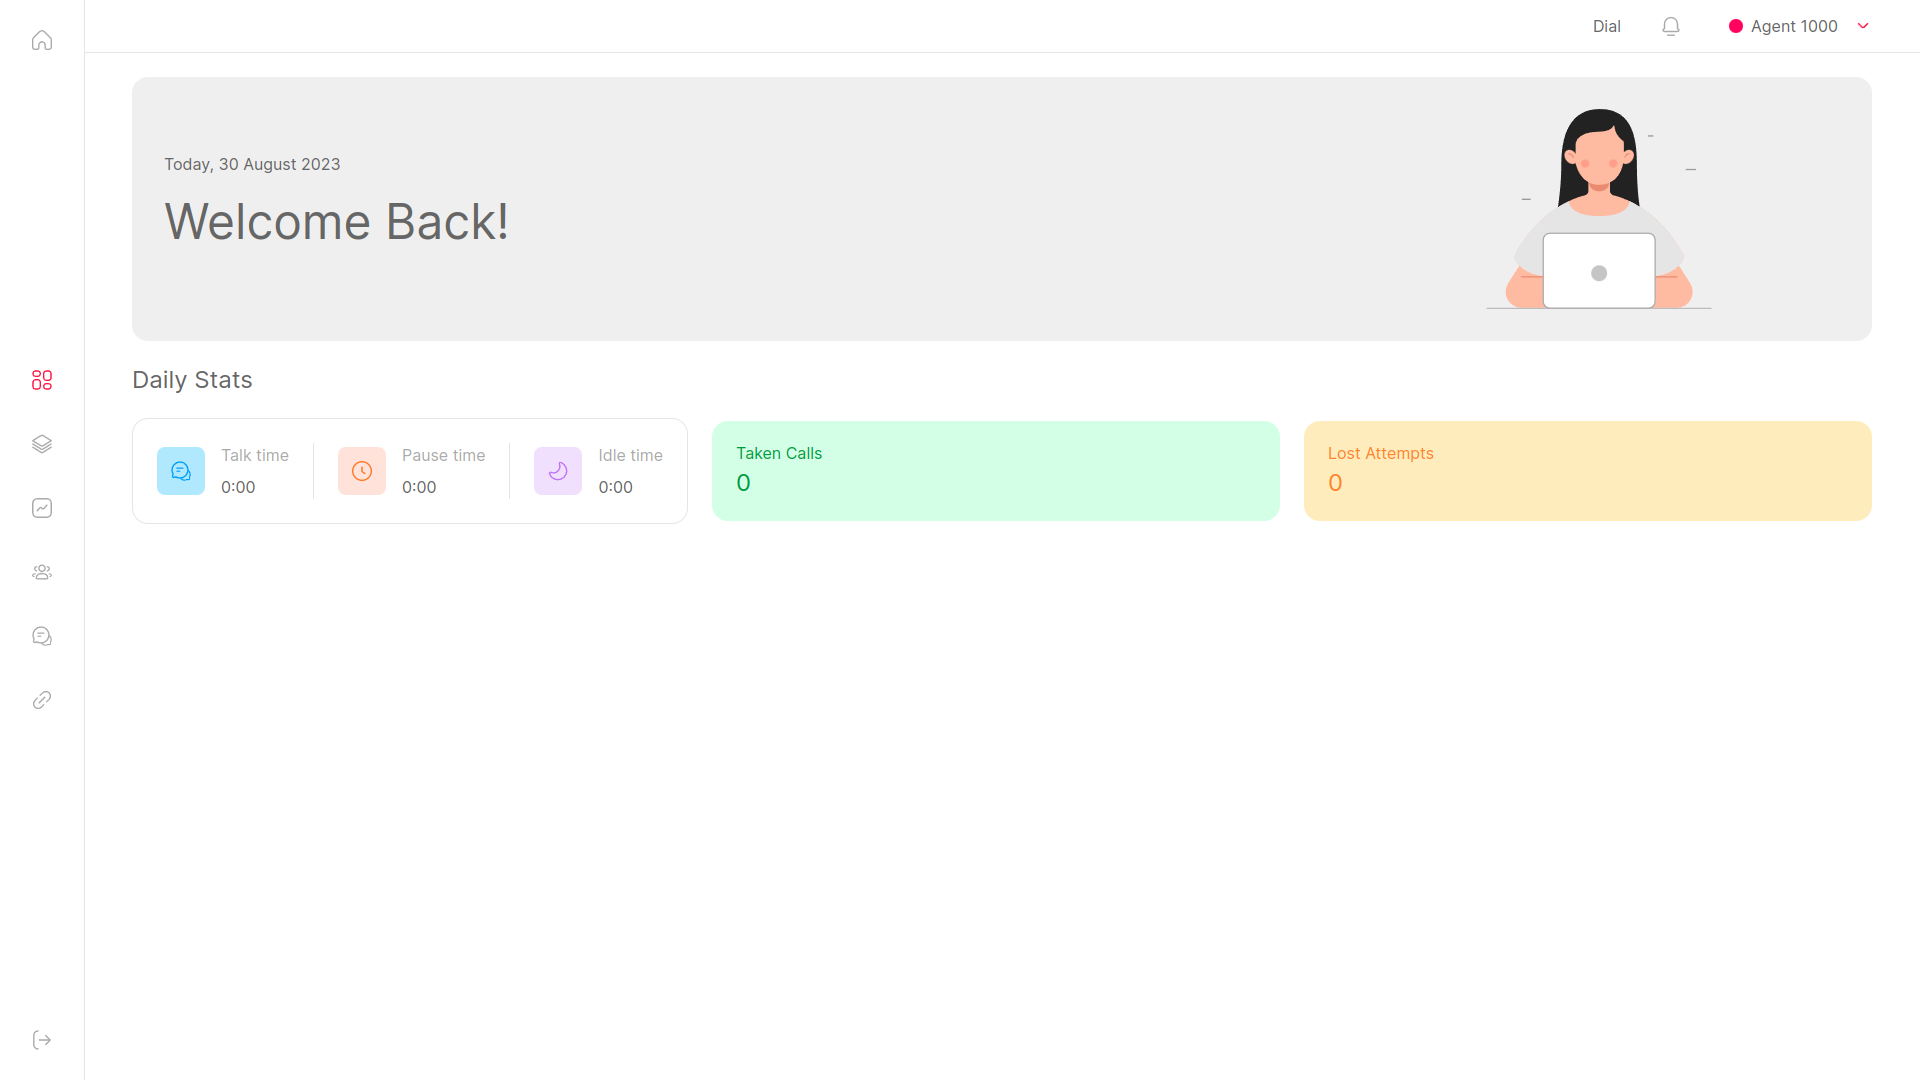
The first view that will show when looking into the Agent Page, is the Overview.
The Overview will present the Agent with a rundown of their Daily Stats. Namely:
-
Talk Time: How much time the agent has spent on call today.
-
Pause Time: How much time the agent has spent on pause today.
-
Idle Time: How much time the agent has spent in an idle state today. Idle time is defined as time the Agent was available to receive calls on at least one queue, without being on a break.
-
Taken Calls: How many calls the agent has answered today.
-
Lost Attempts: How many times did the PBX try to call the Agent with no success.
Start/End Work
The Start/End work button is a quick way for the agent to start working. This button will only appear if the agent has logged in in the past, and QueueMetrics knows which extension the Agent uses.
By clicking on this button, the agent will be taken to the Control view, and automatically join all the queues they are assigned to. An Administrator can assign queues to an agent from the Queue Configuration page.
Navigation Menu

The Navigation Menu on the left side of the screen allows the Agent to move between different views. There are different available views, listed below:
-
Overview: Shows a general overview of the Agent State and Stats.
-
Control: Allows the Agent to join/leave queues, and allows them to pause/unpause themselves.
-
Interactions: Shows the list of Calls/Interactions the agent has handled throughout the day, with actions.
-
Clients: Search engine for Clients and Client creation/editing.
-
Cases: Search engine for Clients and Client creation/editing.
-
WombatDialer Preview Dialing: If a valid URL for a WombatDialer instance, a WombatDialer icon will appear, allowing the agent to access the Preview Dialing Panel.
-
CRM: Shows the user-defined links to external CRM systems.
The Navigation menu also has a logout button at the bottom, that will log the agent out of the Agent Page.
| Logging out of the Agent Page does NOT log the agent out of any queues he might be working on. Make sure the Agent logs out of the queues from the Control view before logging out of the Agent Page, if they don’t plan on being available on queues any longer. |
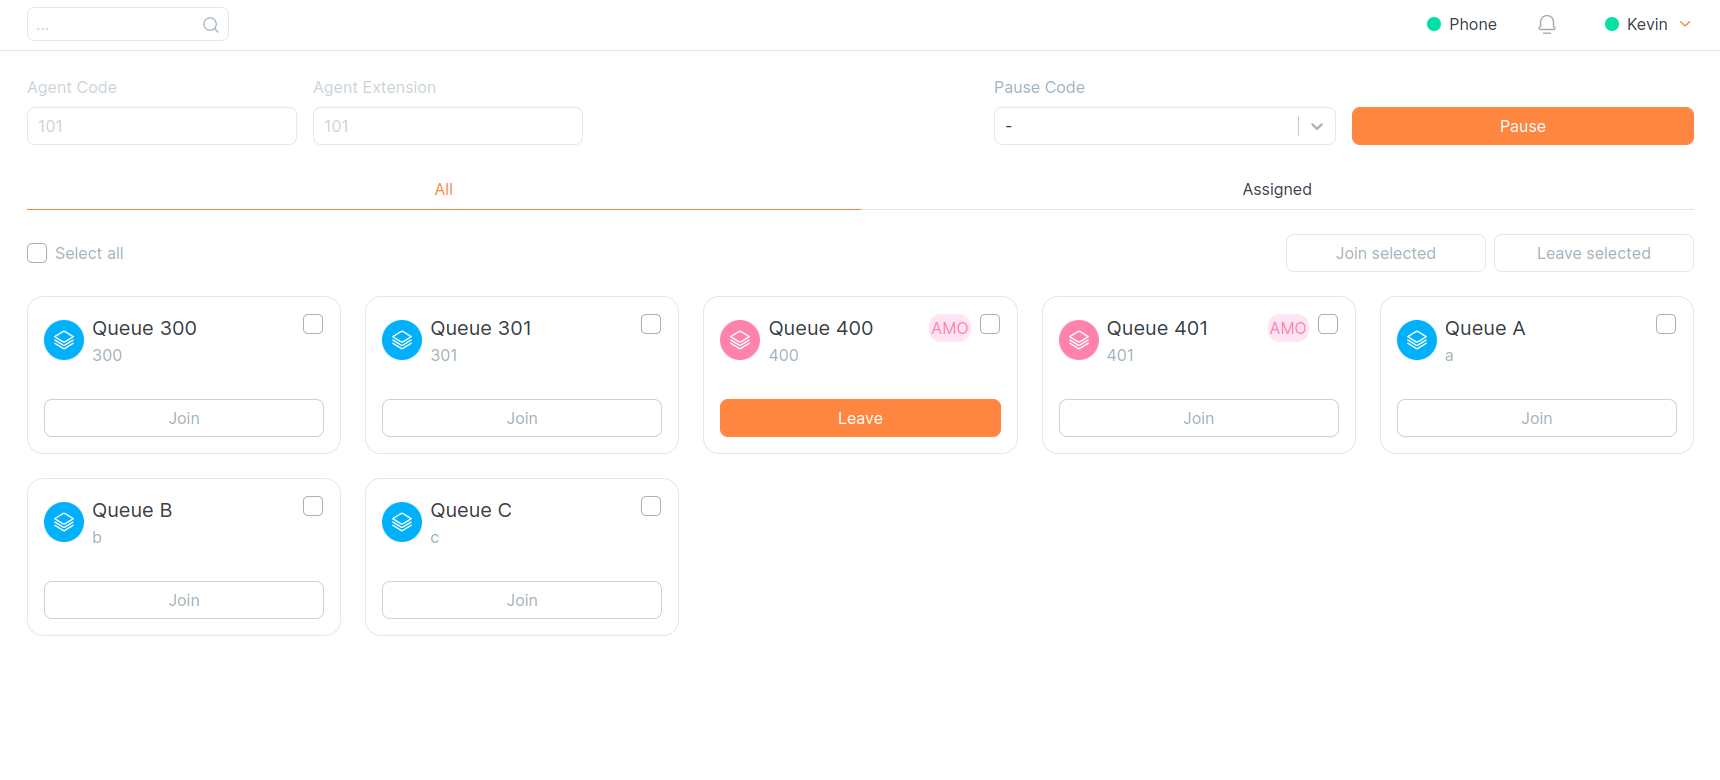
Control
The Control view is the main view for the Agent to join/leave queues, check their current status and pause/unpause themselves, as well as picking which extension they want to use.
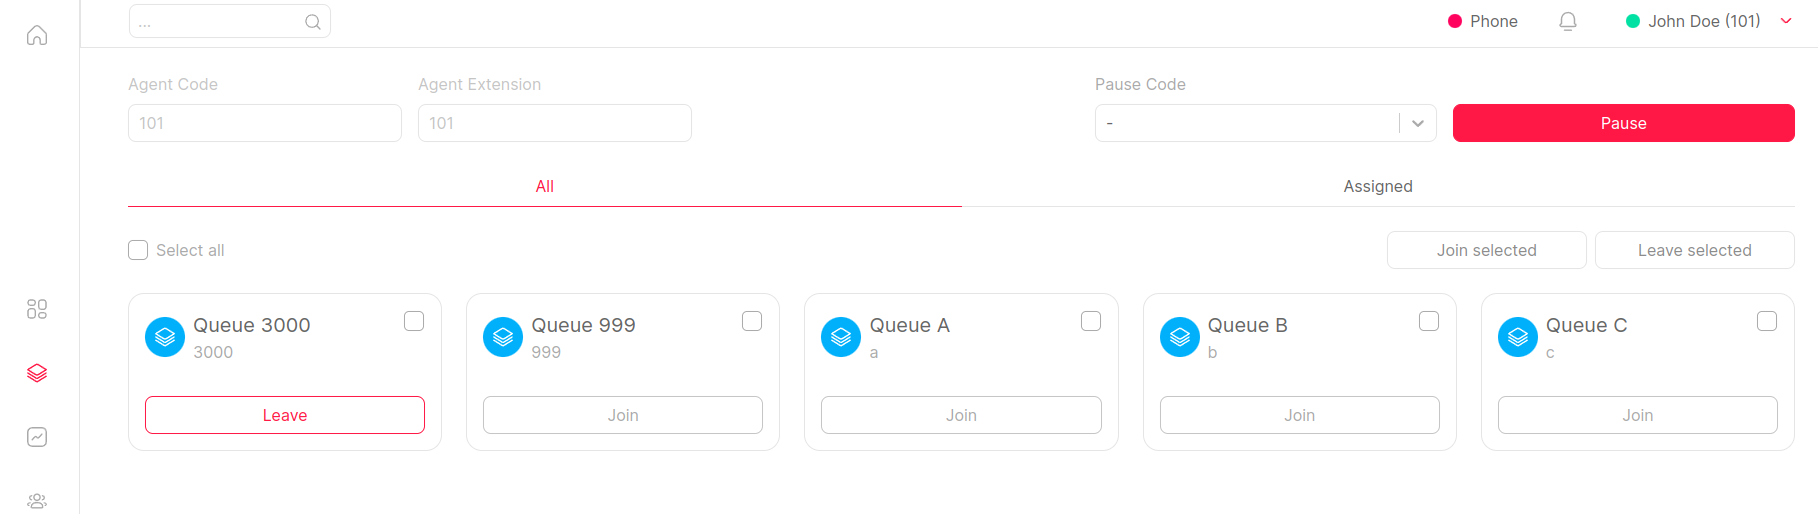
Extension
By changing the extension field, an Agent will be able to change which extension they are using when joining queues. Agents can change their extension only if hotdesking is enabled in the System Parameters.
| If this field is empty, it means that QueueMetrics doesn’t know the Agent’s extension. Without this information, it will be impossible for QueueMetrics to let the Agent join queues, so Agents should always ensure their extension is properly set. |
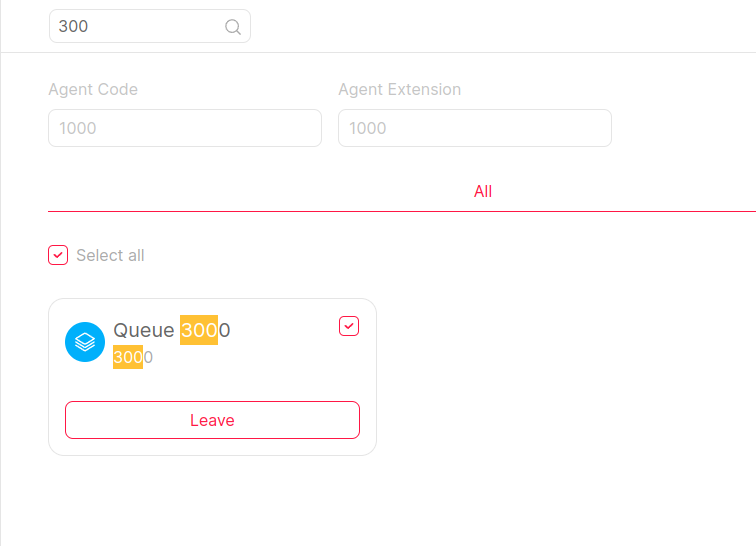
Joining queues
Once the Extension is set, the Agent can join one or more queues by either
-
Clicking on the Join button for each individual queue they want to join.
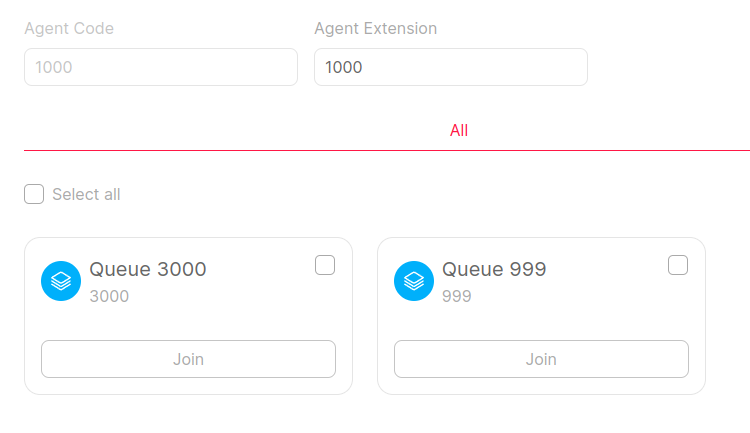
-
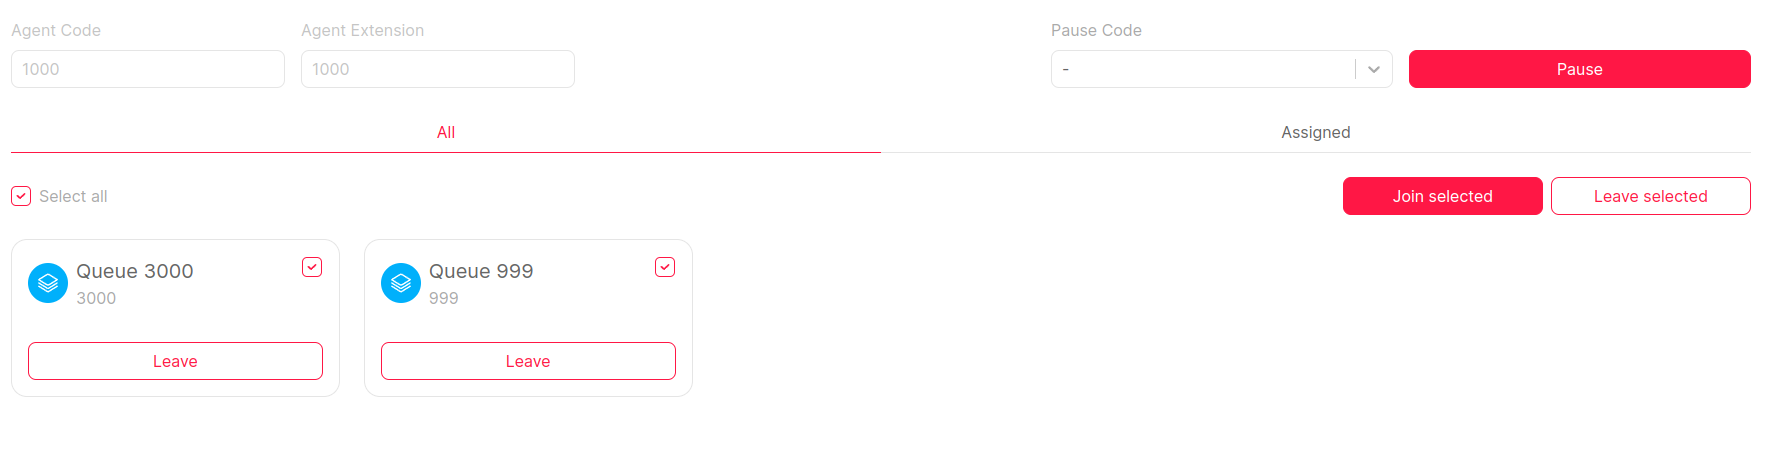
Selecting queues using their checkboxes (or the Select All checkbox on the top left), then clicking on "Join Selected".
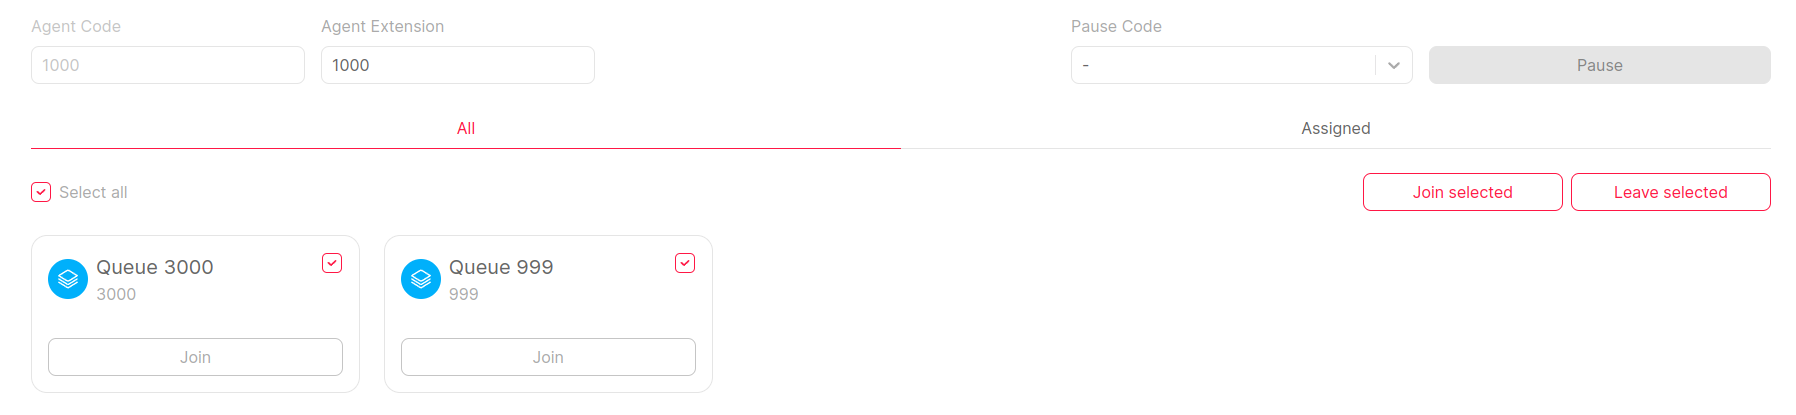
By doing this, QueueMetrics will send a Join request to the PBX, and will update the Agent’s status on said queues as soon as it obtains a response from the PBX.
| If the agent has too many queues, they can always use the searchbar in the top left to filter the queues that appear in the page. |
| Since QueueMetrics 24.05, queues on which the agent is working have a green border to make them easily identifiable. |
Interactions
The Interactions view provides agents with a comprehensive overview of all the interactions they have handled during the current day.
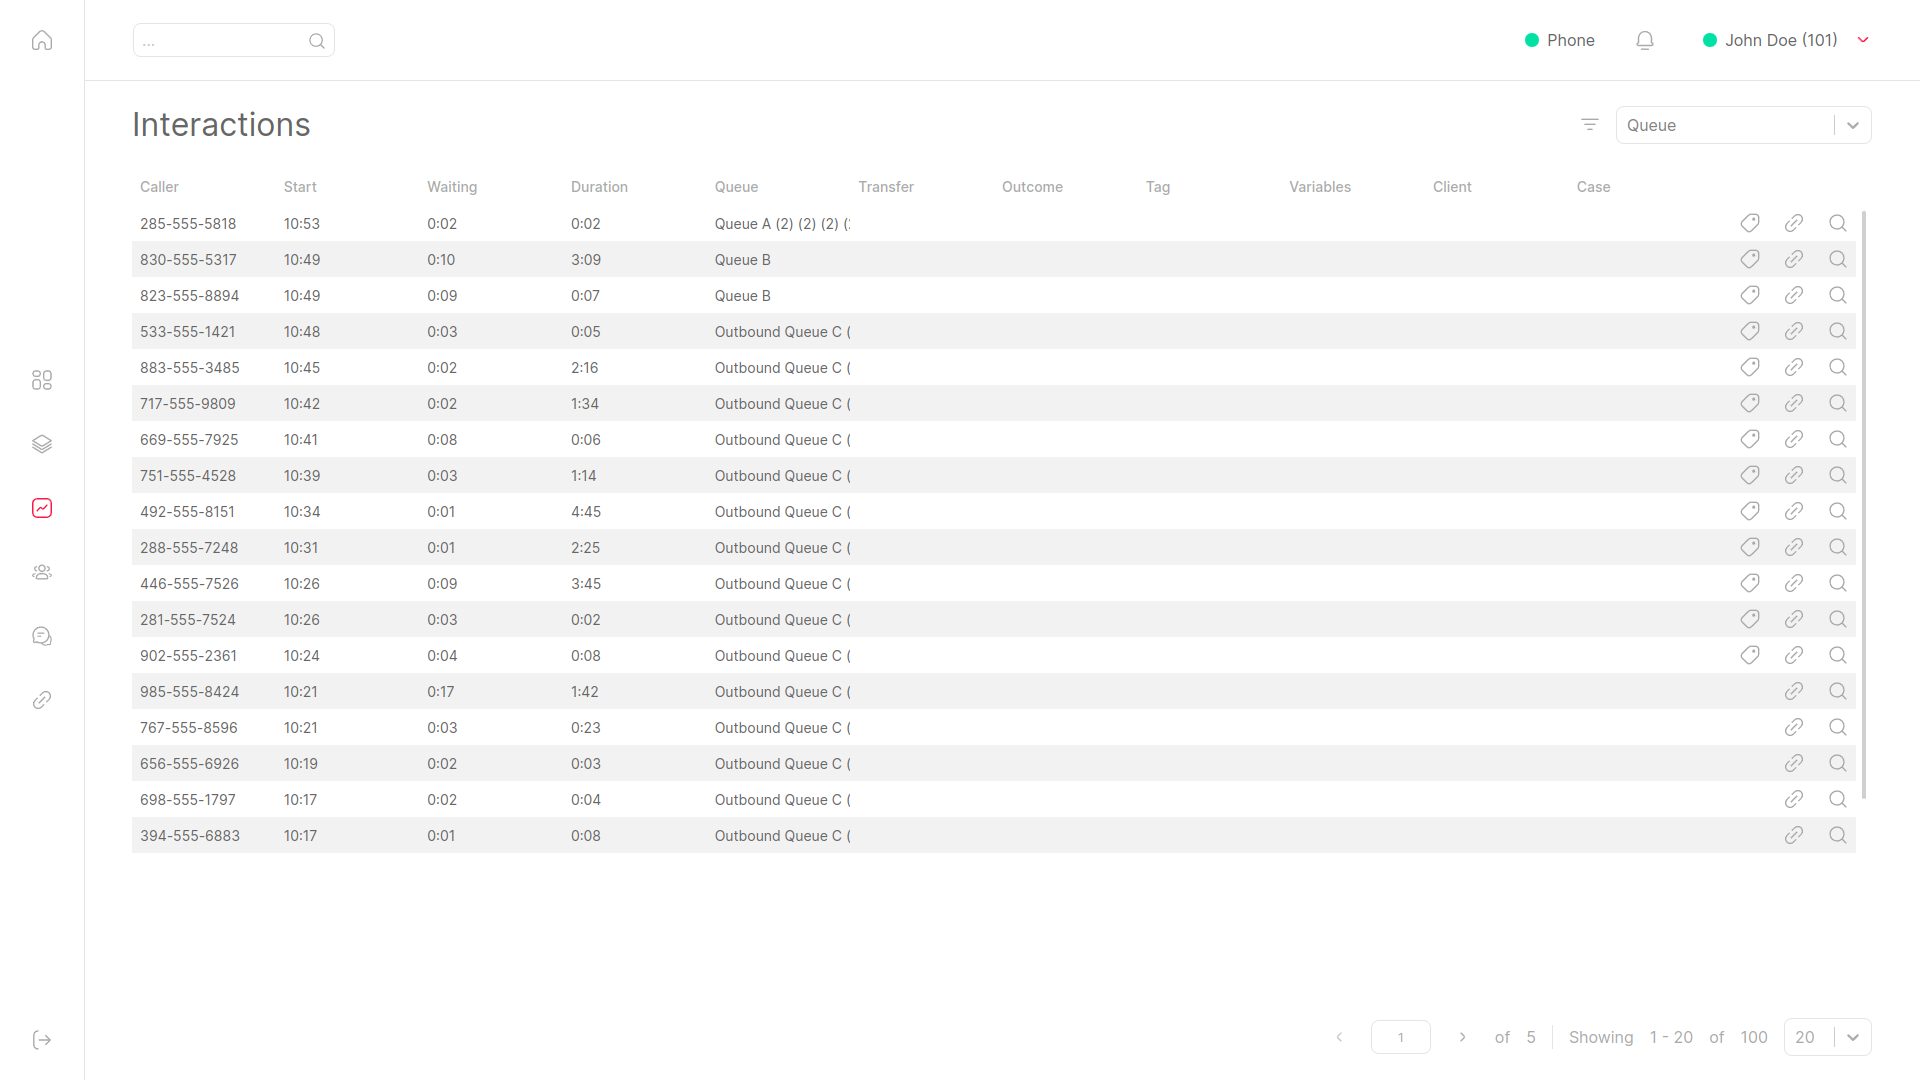
For each call, QueueMetrics presents detailed information.
To the right of each entry, you will find three buttons:
-
labelicon: This button allows you to tag a call with an outcome and one or more feature codes. -
urlicon: Clicking this button opens the call’s associated URL. -
magnifiericon: This button provides access to the call’s detailed information.
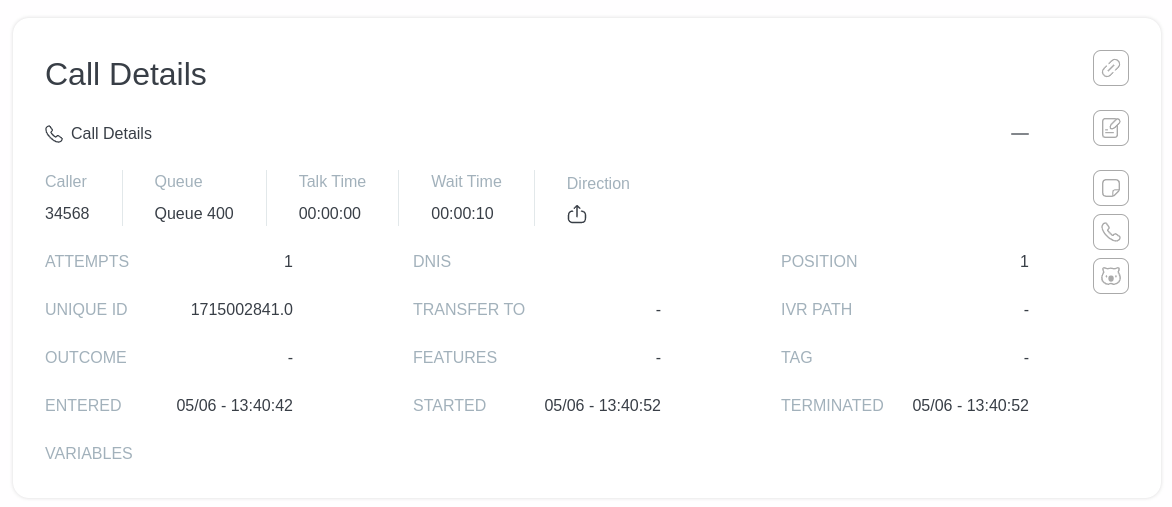
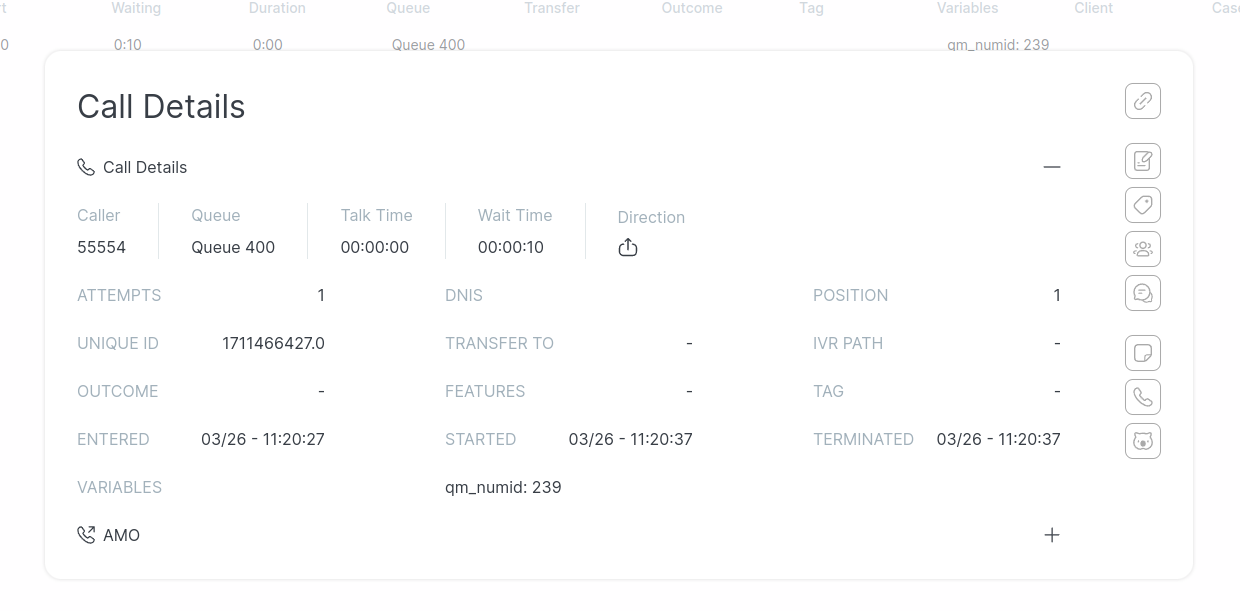
Interaction Details

In this section, users can access comprehensive details about the interaction they are reviewing, which includes the following information:
-
Caller
-
Queue
-
Talk Time
-
Wait Time
-
Direction
-
Number of Attempts
-
DNIS (Dialed Number Identification Service)
-
Position
-
Unique ID
-
Transfer To
-
IVR Path
-
Outcome
-
Features
-
Tags
-
Time Entered
-
Time Started
-
Time Terminated
-
Custom Variables
From this interface, users can perform various actions on interactions, such as:
-
Open the QA Form
-
Label a Call
-
Open the URL
-
Assign the Call to a Client
-
Assign the Call to a Case
-
Initiate a Wombat Recall
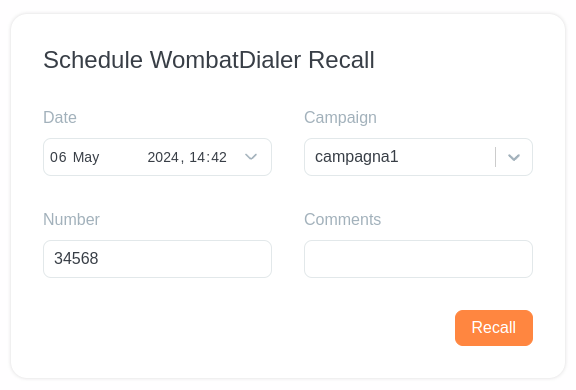
WombatDialer Recalls
QueueMetrics 24.05 introduces the WombatDialer Recall Panel, which enables the user to schedule a recall for the examined call through Loway’s Dialer: WombatDialer. To initiate a recall, press on the WombatDialer recall at the bottom of the right menu of icons.
Clients and Cases
QueueMetrics 23.09 introduces two new concepts to QueueMetrics: Clients and Cases. While the description below addresses how they look like from an agent’s point of view, an administrator’s point of view is available in Configuring clients and cases.
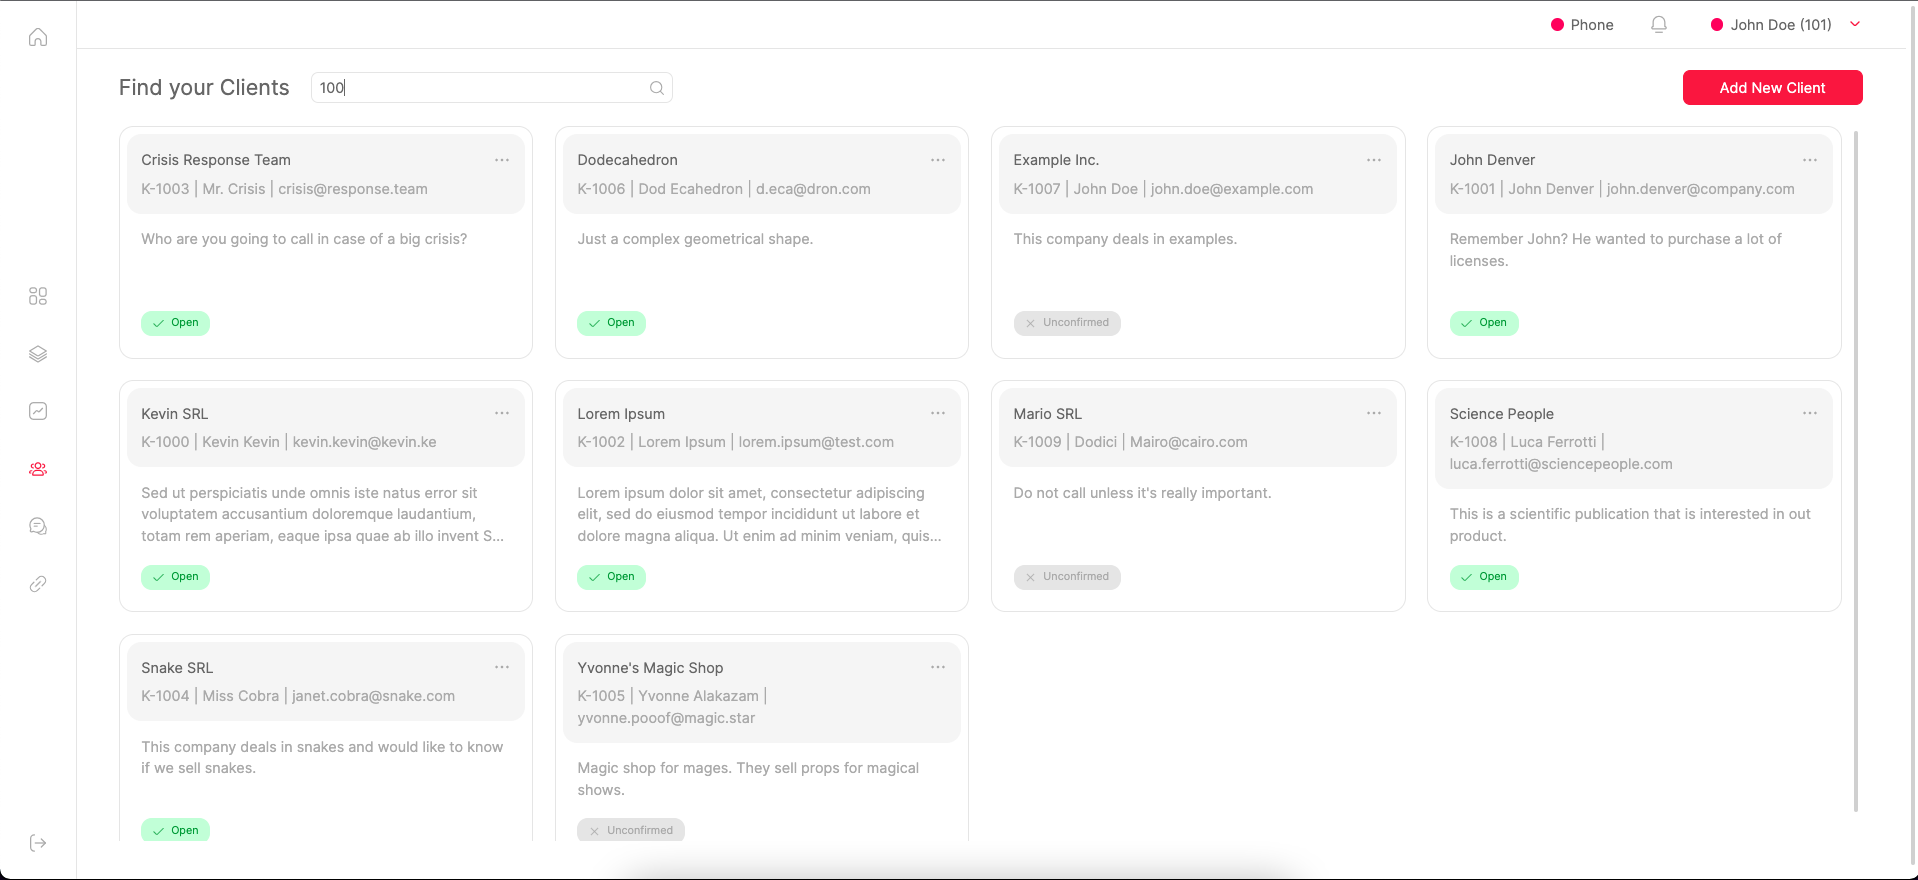
Clients
To create/edit Clients, users need the key USR_CLIENTS_EDIT.
Clients are data structures that can be created to save infromation about customers, functioning as a minimalist CRM inside QueueMetrics.

The information that can be saved about Clients is the following:
-
Name
-
Status (Open, Closed, Unconfirmed)
-
Contact
-
Email
-
External Reference (Will be filled automatically if left blank)
-
Visibility Key
-
Notes
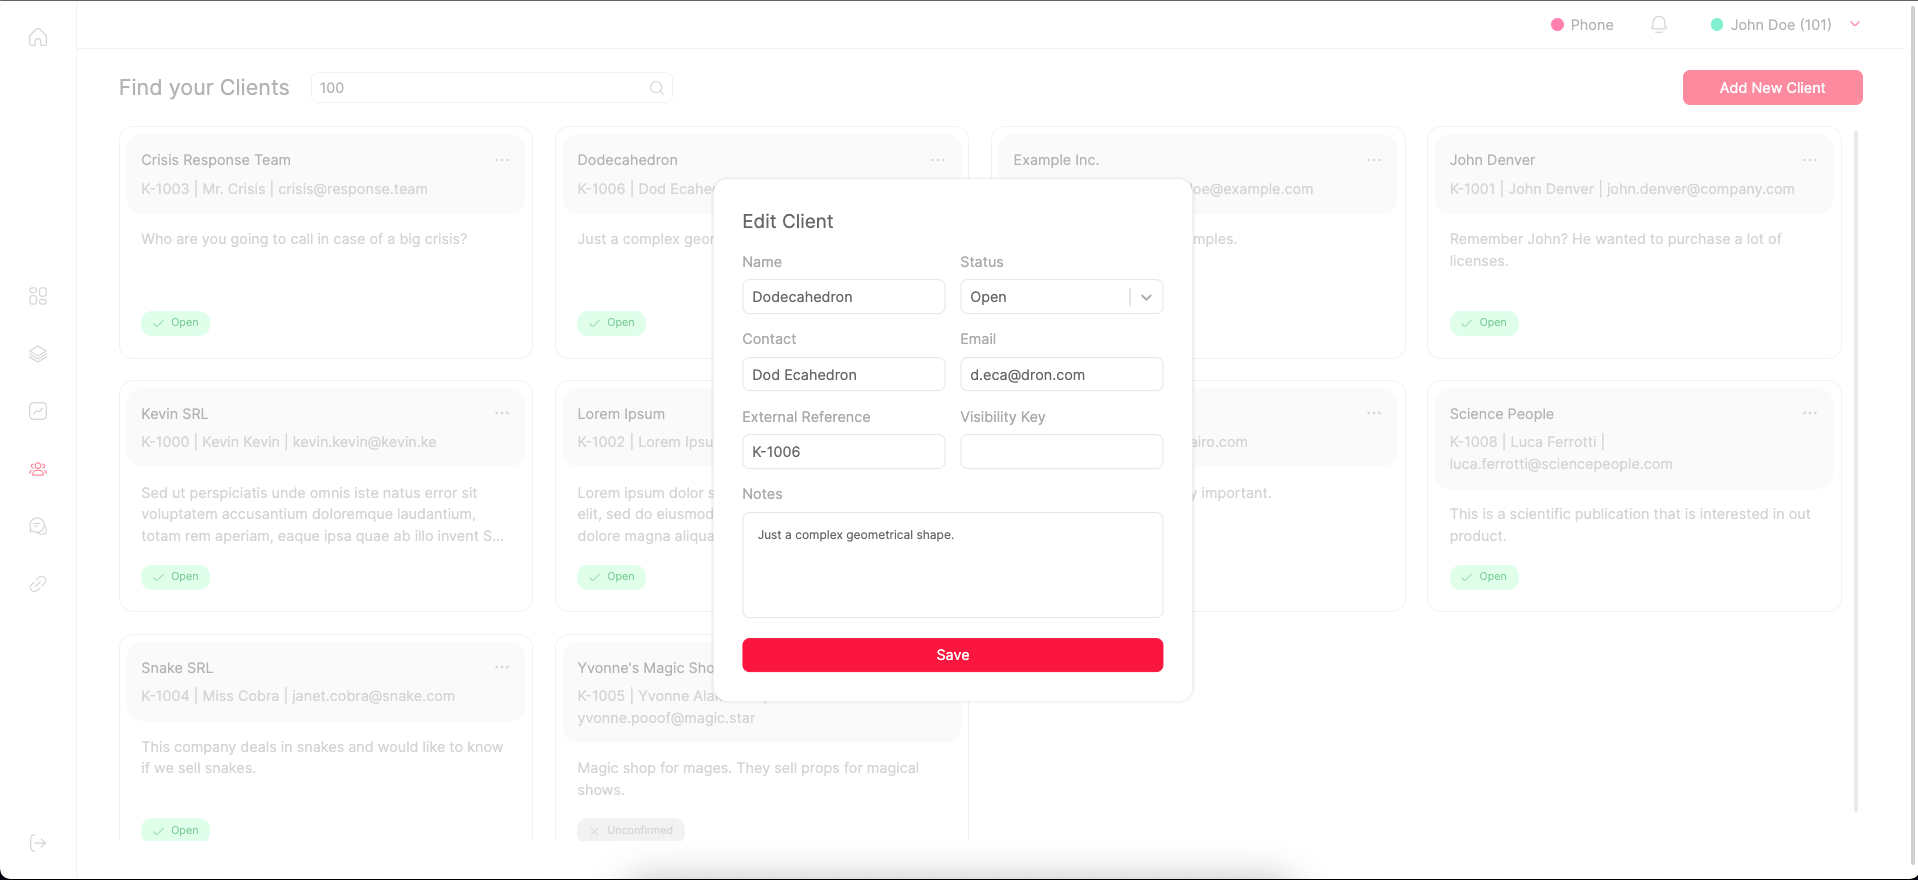
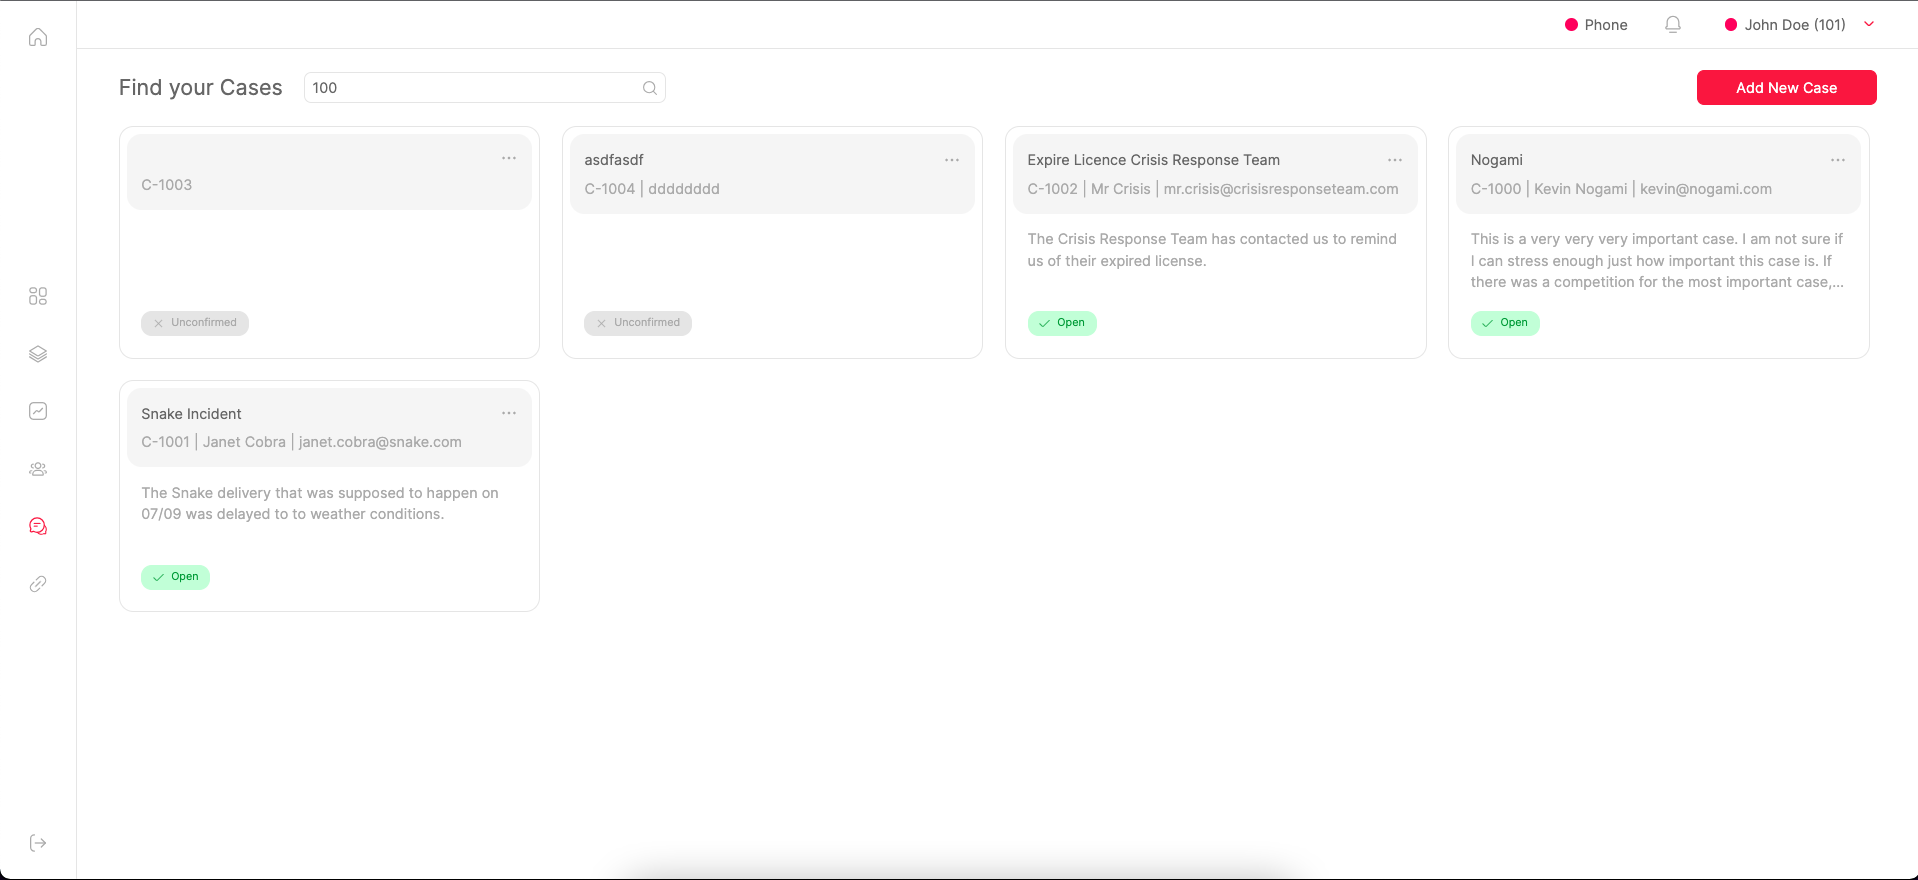
Once a client has been created, it can be accessed by searching for clients in the search bar, and edited by clicking on the card.
Cases
To create/edit Cases, users need the key USR_CASES_EDIT.
Cases are data structures that can be created to save infromation about specific situations, cases, or anything that involves one or more calls, functioning as an entity for the minimalist CRM inside QueueMetrics.
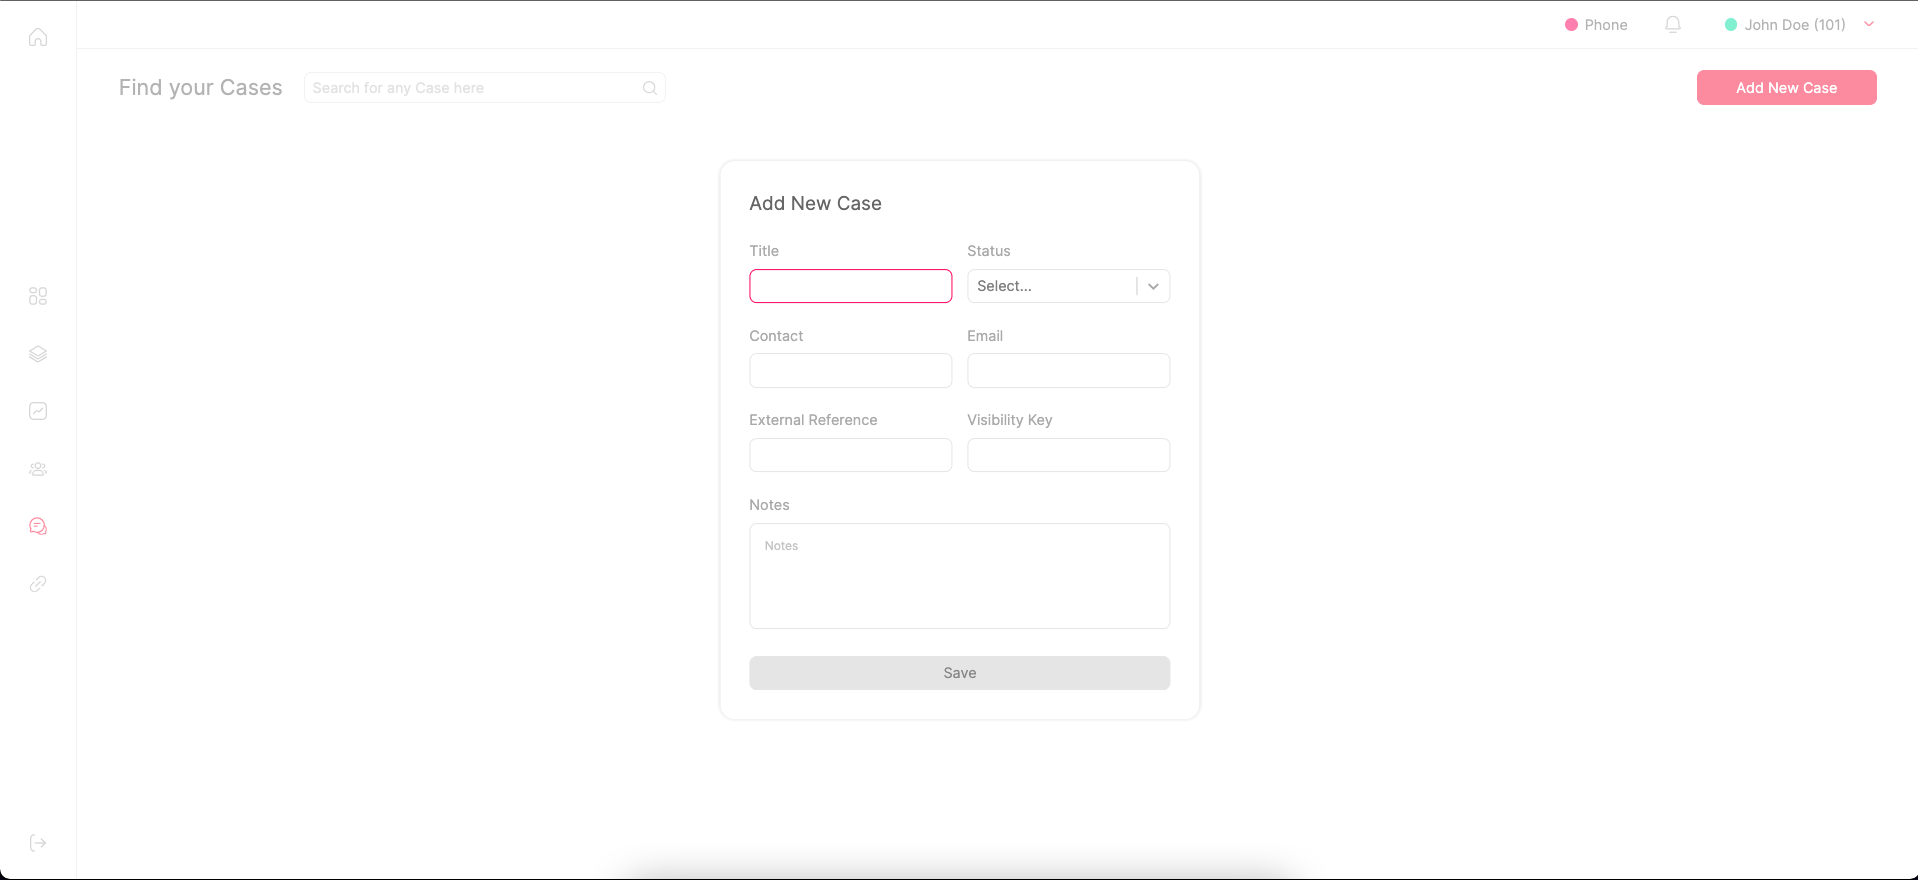
The information that can be saved about Clients is the following:
-
Name
-
Status (Open, Closed, Unconfirmed)
-
Contact
-
Email
-
External Reference (Will be filled automatically if left blank)
-
Visibility Key
-
Notes
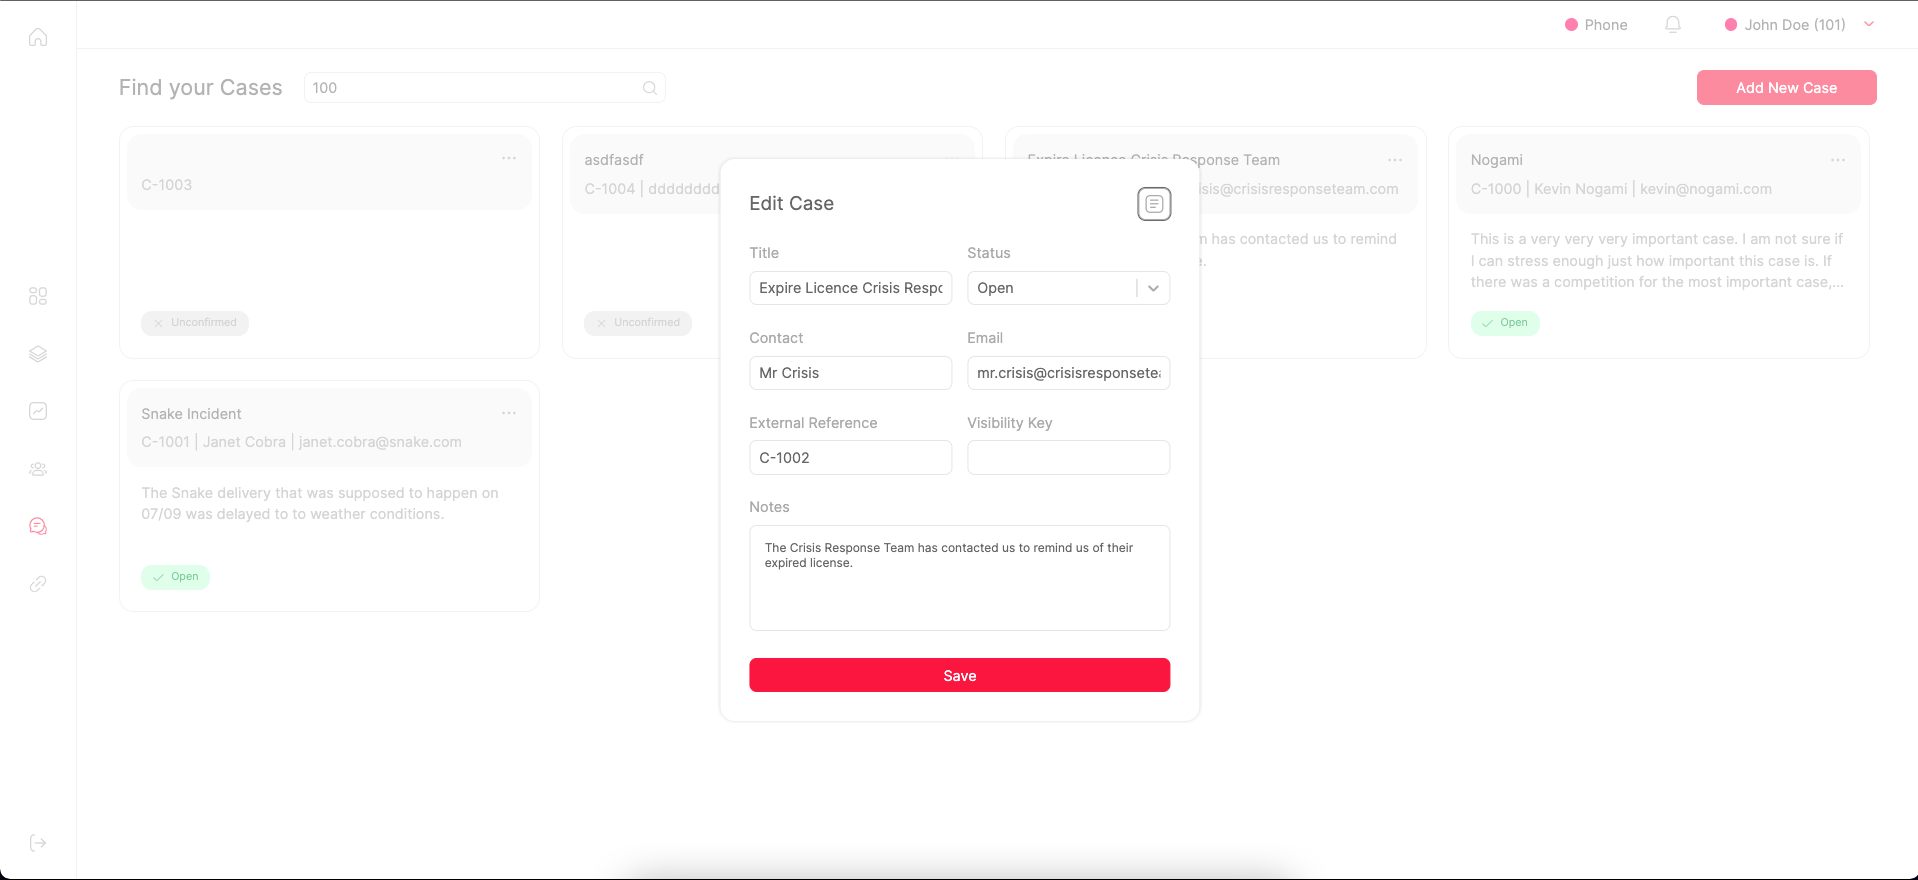
Once a case has been created, it can be accessed by searching for clients in the search bar, and edited by clicking on the card.
CRM Integration
In QueueMetrics, you can seamlessly integrate your CRM (Customer Relationship Management) system by configuring CRM links through the navigation menu. These links are defined in QueueMetrics' system parameters.
The properties that regulate these CRM links are as follows:
-
realtime.agent_web1_url: This property specifies the URL used as the first CRM URL in the QueueMetrics Agent page. The key can be populated with a URL where certain tokens will be expanded by the QueueMetrics engine. Valid tokens include [A], which will be expanded with the agent code. See alsodefault.crmappanddefault.crmlabel. -
realtime.agent_web1_label: If present, this property is used by the Realtime Agent page to identify this specific background on the dropdown menu. -
realtime.agent_web2_url: Similar to the first URL, this property specifies the URL used as the second in the Realtime Agent page. It can also contain expandable tokens like [A]. -
realtime.agent_web2_label: If present, this property is used to label the second background on the dropdown menu within the QueueMetrics Agent page.
These configurations allow you to link to CRM resources directly from QueueMetrics, enhancing your workflow and productivity.
Screen-pops to your CRM application
Each time the call history changes, and if there is an URL associated to the call shown on top of the list, a new window will automatically be opened pointing to the specifig URL. This feature could be disabled modifying the value associated to the configuration key realtime.agent_autoopenurl.
URLs are passed to the Queue() command in Asterisk, or - if missing - they can defined in the QueueMetrics queue configuration as a default. If not present, the URL defined in the default.crmapp property will be used (make sure the default.crmlabel property is also defined). The URL can include a set of placeholders that are expanded with the details of the call being handled, as in the following table.
| Placeholder | Meaning |
|---|---|
[A] |
The agent’s numeric code, e.g. 101 for Agent/101 |
[X] |
The agent’s login extension |
[U] |
The call’s Asterisk UniqueId |
[S] |
The Server ID (for clusters) |
[Q] |
The name of the queue |
[T] |
The timestamp of the call |
[C] |
The caller-id, if present |
[D] |
The DNIS, if present |
[I] |
The IVR Path, if present |
[O] |
The outcome code, if present |
[P] |
The position in the queue, if present |
[M] |
The number of attempts, if present |
[TAG] |
The call tag, if present. See Adding Tags to a call. |
[F:x] |
If the call has a feature called 'x', the text of feature 'x'; otherwise blank. See Adding Feature codes to a call. |
[FX:x] |
If the call has a feature called 'x', it is set to '1'; otherwise '0' |
[V:x] |
If the call has a variable called 'x', the value of 'x'; otherwise blank. See Custom variables. |
SoftPhone
The new real-time agents page integrates a softphone based on the JsSIP library. This softphone is expected to work witth all recent Asterisk releases (13+) and recent browsers.
The softphone automatically registers to the SIP/WebRTC server with the SIP credentials specified in the user administration page and a green bullet is shown in the softphone panel. The agent can start calls typing the number to be dialed then clicking on the "Start Call" button.
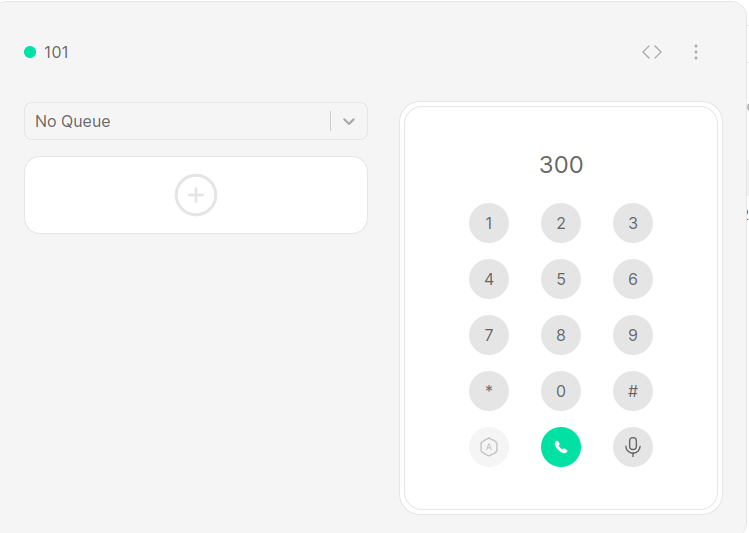
Each time the agent receives a call from the queue, the softphone pops up and will prompt the user to answer. Clicking on the "Start Call" the agent could answer to the call. During the call touch tones could be sent by clicking on the dial pad provided in the panel. Since QueueMetrics 15.02 the softphone shows the callerId SIP username (usually this information matches the incoming caller ID).
For more information on how to configure the softphone, please refer to Configuring the new Real-time Agents Page and Configuring agents
| The softphone uses the local PC microphone. Chrome security policies allow permanent use of the local microphone only for sites secured with HTTPS. Please make sure your QueueMetrics instance is running over HTTPS and relax all security policies for the QueueMetrics URLs. This could be done by clicking on the shield located in the Chrome URL bar and selecting "allow not secure scripts for this site". Be sure to allow microphone usage for the QueueMetrics URL at the very first call. |
Softphone settings
The integrated softphone uses a combination of agent settings and system parameters to fetch it’s own settings.
The settings that are available in the Edit system parameters page and in the Explore system parameters page are the following:
-
default.connection_recovery_max_interval: Maximum time interval before attempting a reconnection in case of connection failure
-
default.connection_recovery_min_interval: Minimum time interval before attempting a reconnection in case of connection failure
-
default.no_answer_timeout: How long should a call ring with no answer before being hanged up.
-
default.iceservers: List of STUN / TURN servers to use (e.g. stun:stun01.sipphone.com|stun:stun01.sipphone.com|stun:stun.fwdnet.net)
-
default.websocketurl: URL for the web socket that the softphone uses to send data (e.g. wss://10.10.5.181:8089/ws)
| These settings will be shared across all agents using the softphone and are not individually configurable. |
The softphone settings that are individual for each agent are the following, and can be found in the Agent configuration page, under "Agents" in the Administrator homepage.
-
WebPhone Username: the SIP username for the extension
-
WebPhone Password: the SIP password
-
WebPhone Realm: the SIP realm (eg: 10.10.5.181)
-
WebPhone SIP Uri the SIP URI (eg: sip:200@10.10.5.181)
-
Auto answer details if the oftPhone should operate in auto answer mode (Default is no)
The AutoAnswer Feature, if enabled, allows the softphone to answer calls automatically. This applies only if there are no other active calls at the moment. If the agent is already on a call, and receives another call, this call will ring normally, regardless of auto answer being enabled.
Users with the security key AUTOANSWER_PHONE can enable/disable the auto answer feature by clicking on the auto answer icon (Speech bubble icon). If the icon is green, auto answering is enabled, if it’s black auto answering is currently disabled.
Users that do not hold the security key cannot change the auto answer status, that will be decided by the administrator in the agent settings page.
AMO Campaigns
If your agent has visibility on one or more AMO campaigns, they will see them in the Control view.
Once an agent has logged in on an AMO queue, they will be able to make AMO calls directly from the softphone or the dialout panel:
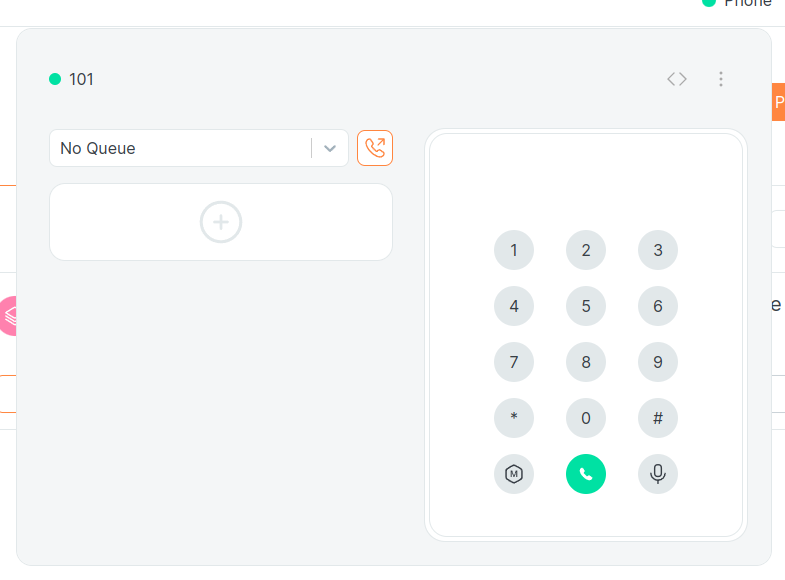
By clicking on the AMO button next to the queue selector, the user will trigger a request to the QueueMetrics server for an AMO call to be made.
| Clicking on the AMO Call button will ask QueueMetrics for an AMO call in the list of numbers that are still available in the AMO pool. It’s not certain that a call will be available to be made, depending on the state of the AMO campaigns and their lists. If an available call is present, it will be dialled automatically, if not, a message will inform the user of the inability to place an AMO call. |
| If there is an AMO call available, it will initiate as soon as the user clicks the button. |
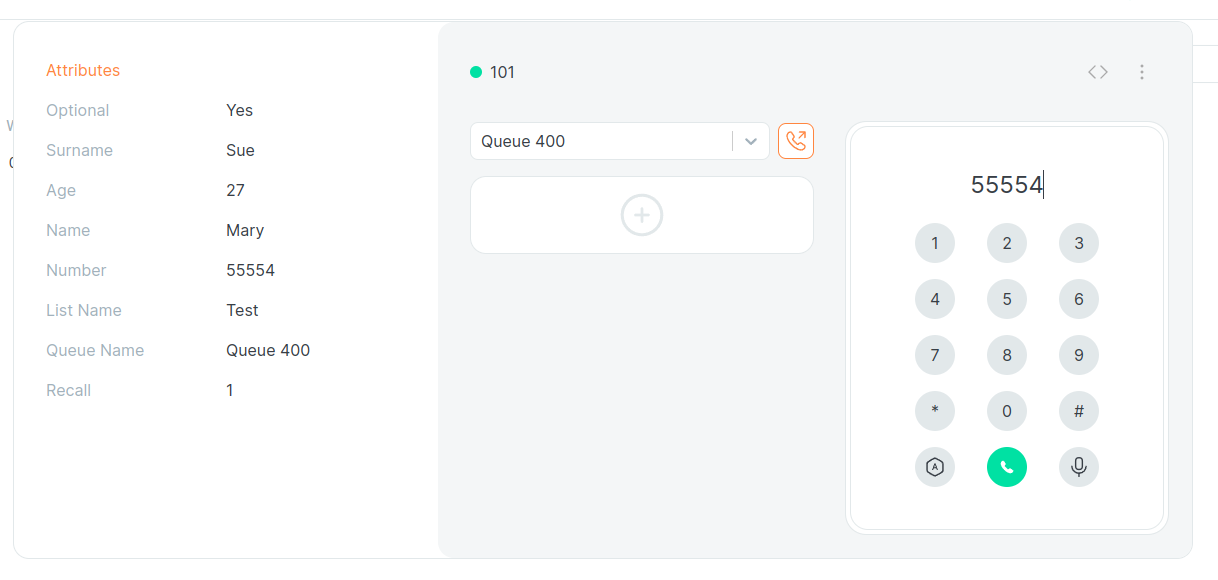
Once an AMO call is initiated, a side panel will open to the left of the Softphone, showing the attributes and relevant information about the number that is being dialled.
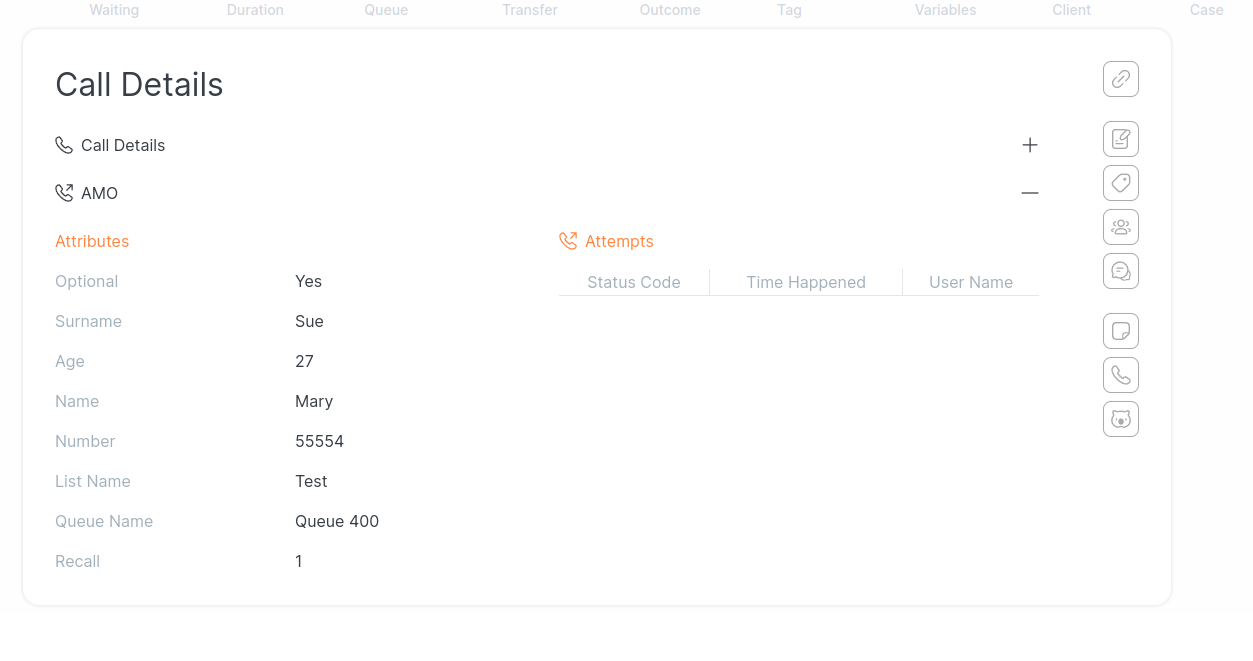
Once the call connects, the Call Details panel will be opened automatically, to offer the agent the possibility to work on the call, taking advantage of the functions of the Call Details panel (Outcomes, Clients, Cases, etc.).
When inspecting the details of an AMO call, an additional section of the Call Details modal is added, as evidenced by the AMO icon at the bottom. Clicking on it will expand the Call Details section, showing the attributes of the call, and the list of attempts made for that number.
Agent Status Panel
The Agent Status Panel provides a convenient overview of the agent’s current status and offers several functions that can be accessed by clicking on the agent’s name in the top right corner.
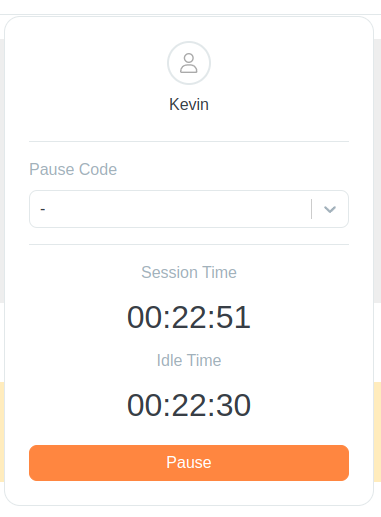
From this panel, users can:
-
View the agent’s current status, session time and idle time.
-
Pause or unpause themselves.
-
Change or amend the pause code.
Please note that the appearance of the "Change/Amend" button may vary depending on the value of the system parameter: default.agentCanAmendPause. For more details, refer to Appendix C: System Preferences.
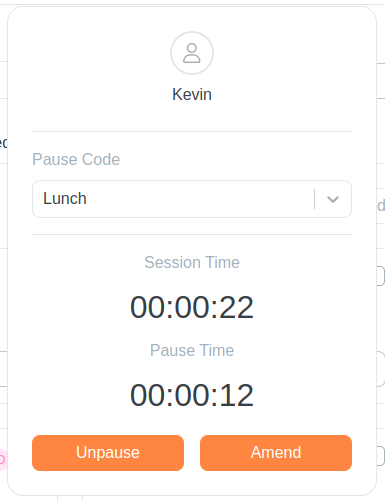
Additionally, if the agent is on a break, the panel displays the amount of time the agent has spent in the current pause.
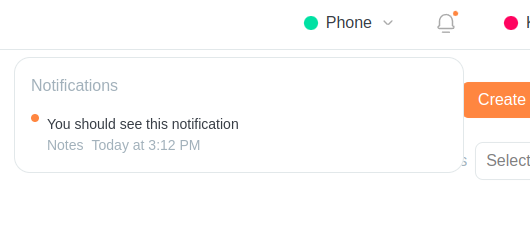
Notifications
The Notifications panel can be accessed from the Bell icon in the top bar on the right-hand side. It serves as a platform to display broadcasted messages to agents.

Key features of the Notifications panel include:
-
Red Dot Indicator: A red dot appears on the Bell icon when new messages are received, providing a visual cue to agents.
-
Message Text: Agents can view the content of received messages directly within the panel.
-
Timestamp: Each message is timestamped to indicate when it arrived.

QueueMetrics Memo System
QueueMetrics 24.05 introduces a new Memo System to aid Agents and Supervisors during their workflow.
The QueueMetrics Agent Page (QAP) offers a specific view for users to browse, create, update and edit their Memos, and three different tabs to further organize their Memos.
Memos can be of several types, inlcuding:
-
Notes
-
ToDo
-
Meeting
-
QA
-
Recall
-
Flag
-
Training
Specifically, some of these are generated in response to specific events, like QA Memos that are sent to the Agents when a Supervisor completes a QA form on one of their calls, while others are just different types of notes that Agents can send to others or themselves, like Notes and ToDos.
Recall Memos can be created from the interaction details of the QAP, and they allow for some special commands in the agent page, namely opening the softphone and initiating a recall for that number automatically, as long as the agent clicks on the recall button.
Memos can have different statuses, that keep track of their completion and acceptance in case of tasks that are assigned to agents, namely:
-
TBD (The task has been created but not completed)
-
OK (The task was successfully completed)
-
Rejected (The task was rejected by the receiver)
-
Refused (The task was refused by the receiver)
-
Rejected (The task was rejected by the receiver)
If these definitions seem a little vague, that’s by design, since most organizations will find their own internal mapping to define what the three different types of rejection mean in their context.
Daily View
In this view, Agents can see their Memos organized by day.
Using the selector on the top right, the user can change the day they are looking at, filtering memos by their expiration date. If a Memo is expiring on a specific date, the user will see it listed in the daily view of that day.

The View is divided in two. A list of pending Memos, whose state is listed as "TBD", and a list of completed ones with status "OK". There is a "Create Memo" button in the top right that will bring the User to the Memo Creation Editor.
Both tables are paginated, and clicking on the checkbox on the left of a pending memo will complete it, while clicking on the same spot for a completed memo will put it back in the Pending list.
Clicking on a Memo will take the user to the Edit Memo page.
Weekly View
In this view, Agents can see their Memos organized by week, in a simil-calendar mode. While the individual days are not strictly divided by hour, they are divided by day, creating different individual lists, one for each day of the week. By using the top selector, the user can change week, moving backwards and forward in time.
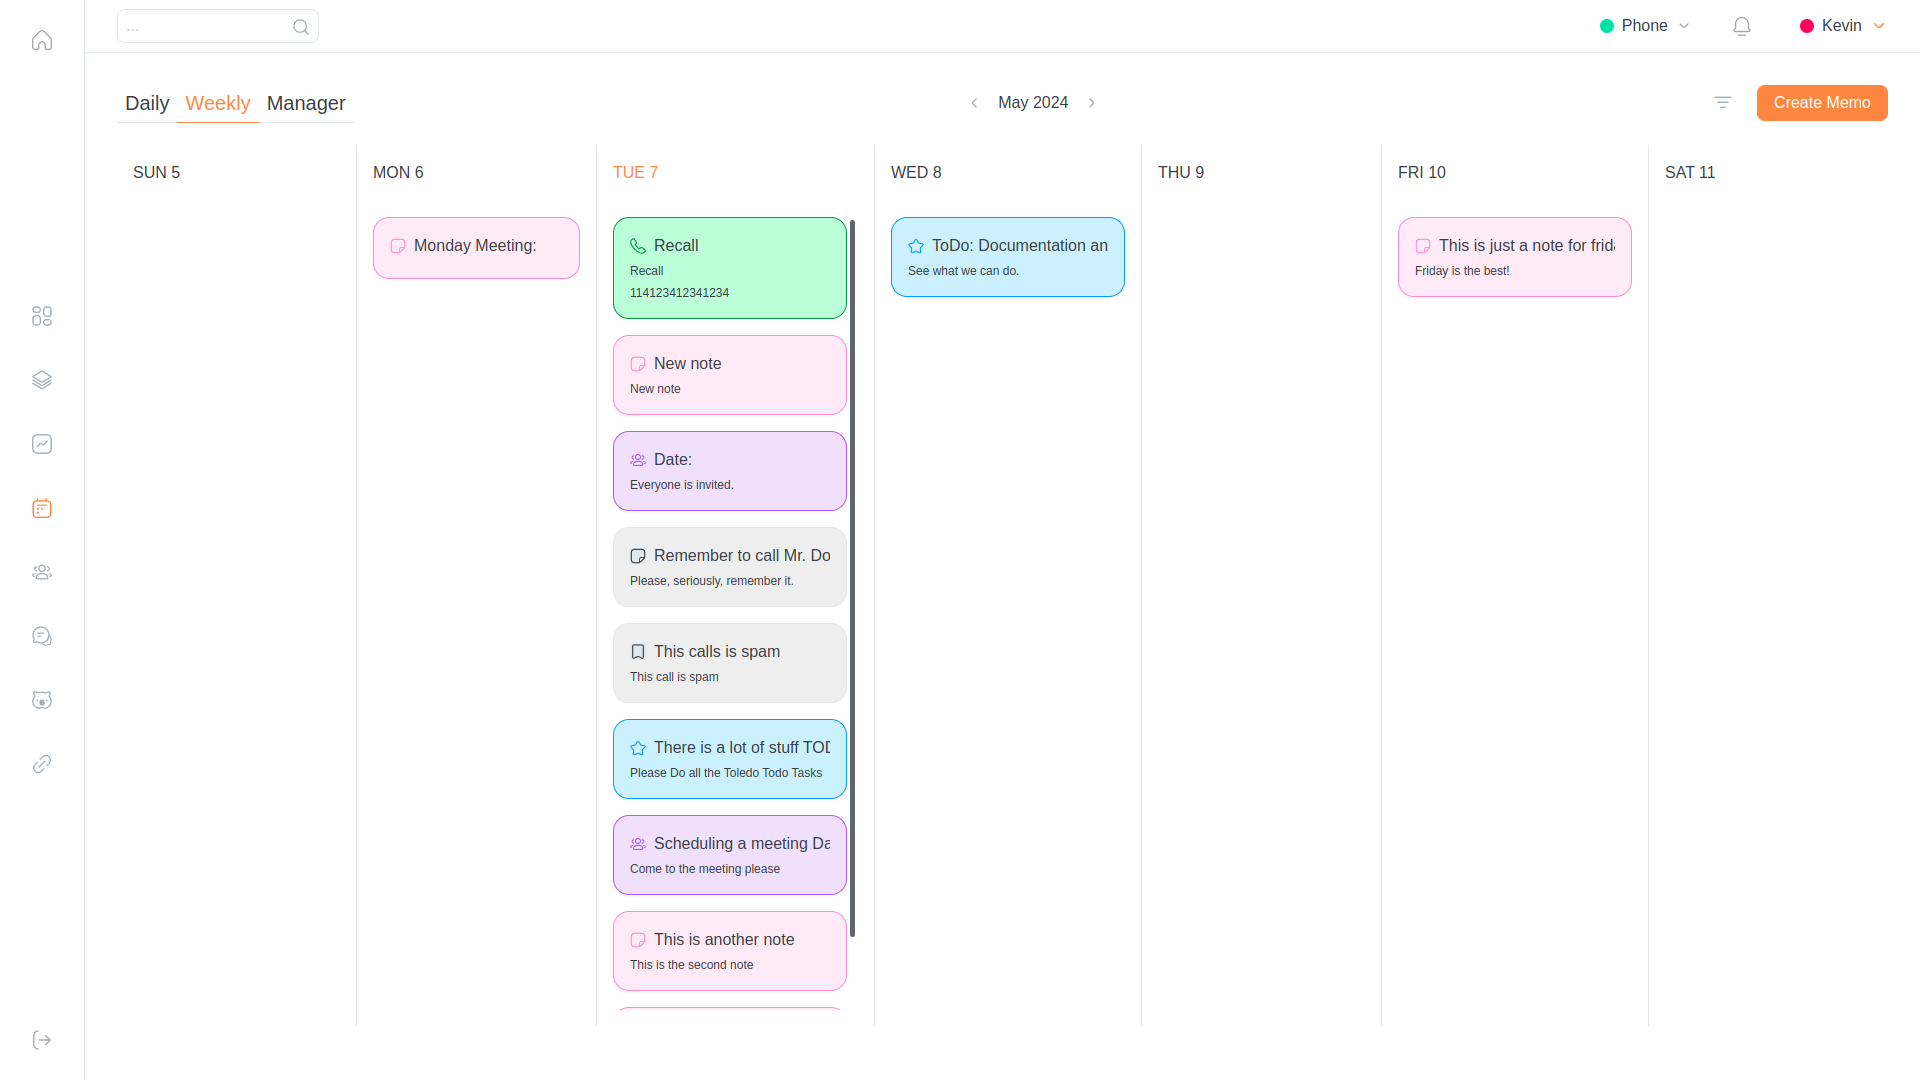
Memos are color coded based on the type, and each type of memo has its own icon. Hovering with the mouse over an icon will tell the user the Memo’s type.
The user will find the Create Memo button here as well, with a filter icon on its left. Clicking on this icon will show two drop-down menus that let them filter Memos by Status and Type.
Clicking on a Memo will take the user to the Edit Memo page.
Manager View
In this view, Agents can see their Memos in full, filtered by many different types of filters. The page appears as a table that lists all Memos that satisfy the User-defined filters.
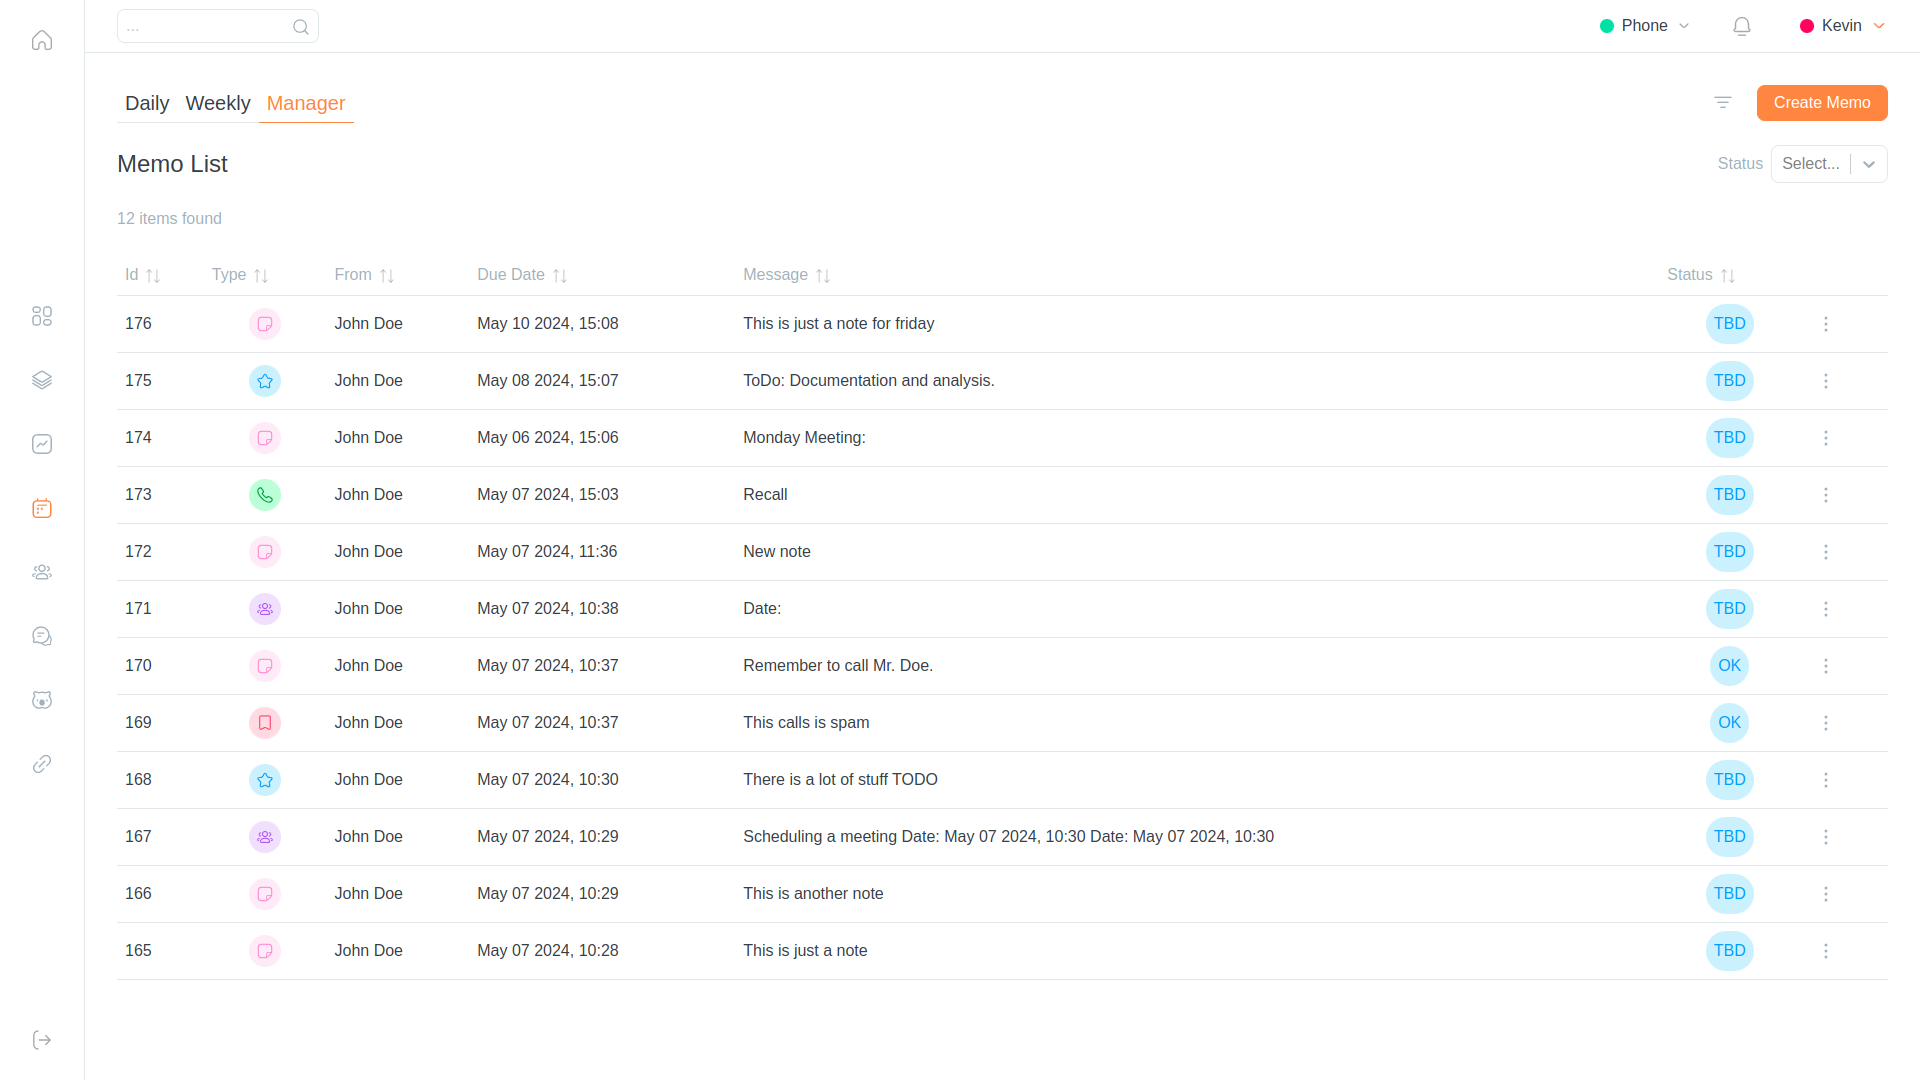
The user will find the Create Memo button here as well, with a filter icon on its left. Clicking on this icon will show two drop-down menus that let them filter Memos by Category and Type, while the Status filter is always visible on the page. Clicking on the filter button will also show two Date selectors that allow the user to indicate a time period for the Memos, showing only memos that are expiring during that period of time.
Clicking on the icon at the right end of every Memo, the user can edit, complete, reject, dispute or refuse the Memo.
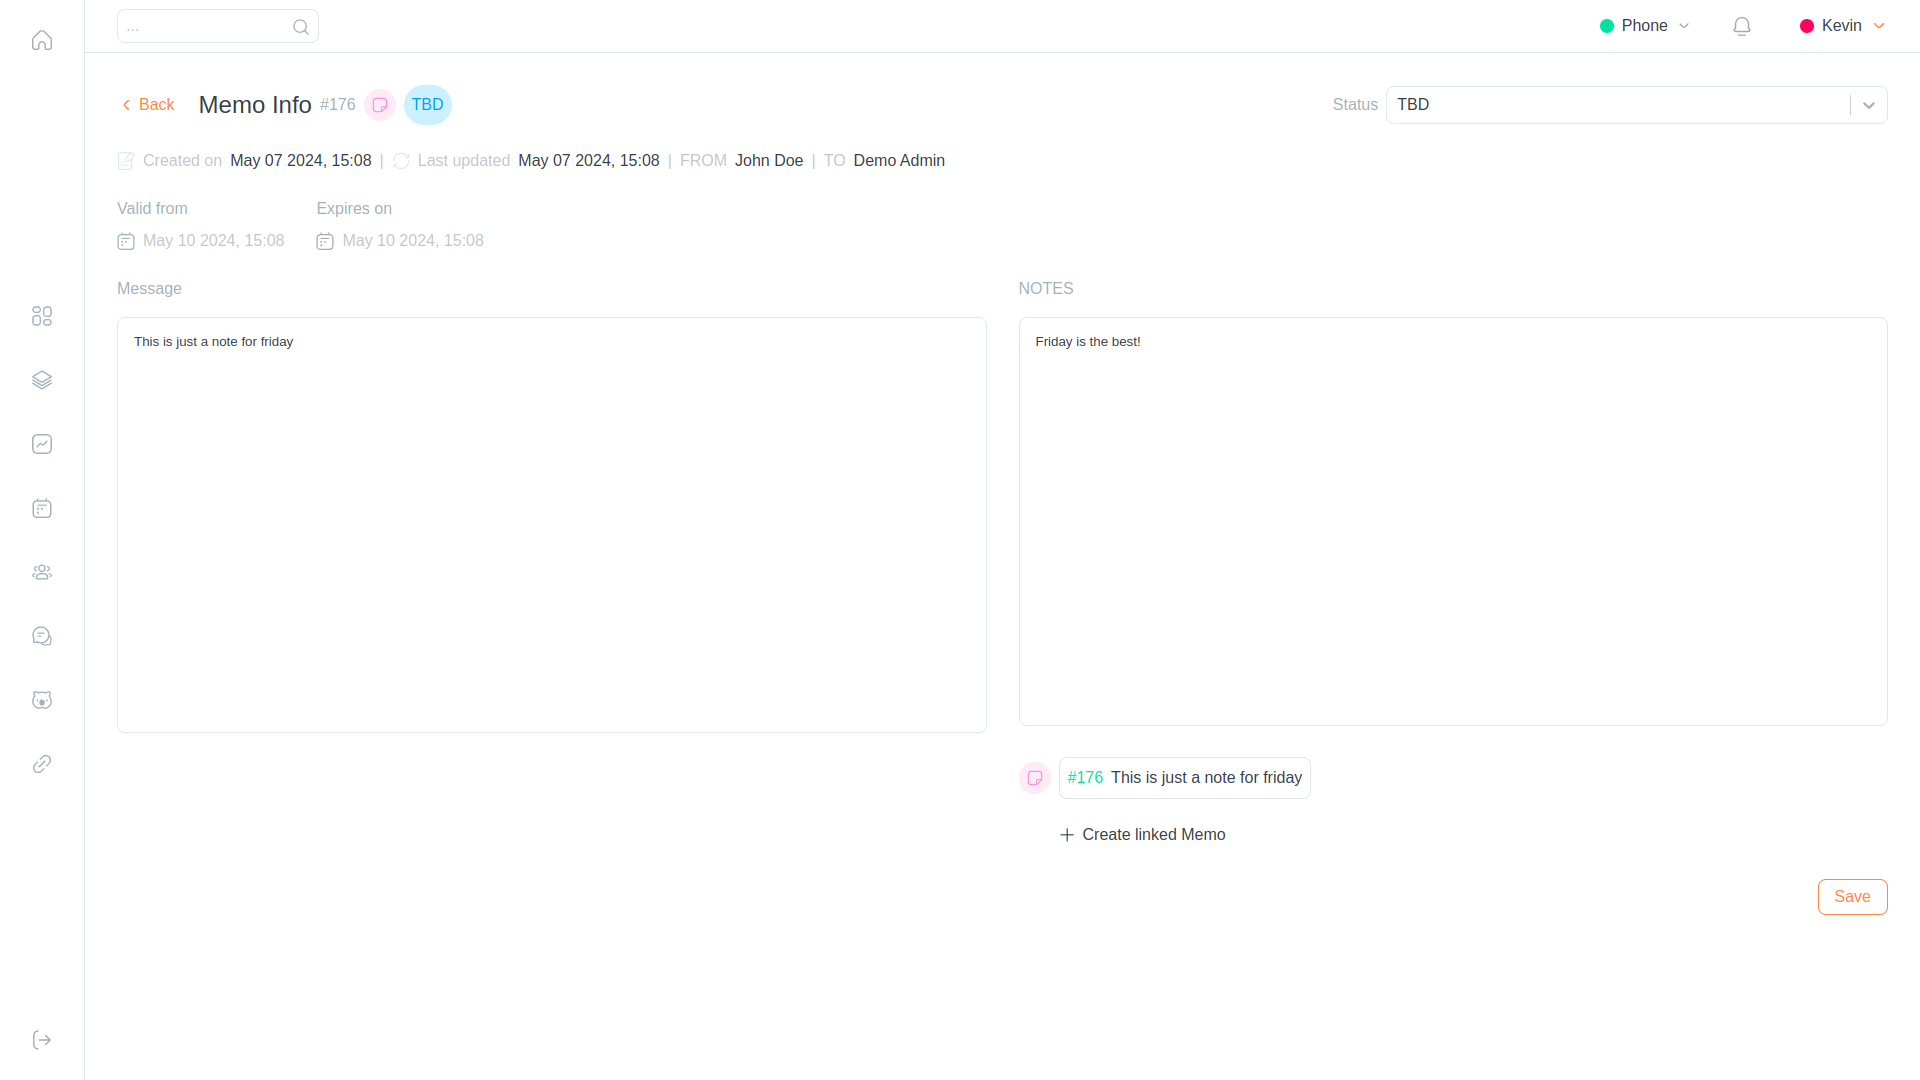
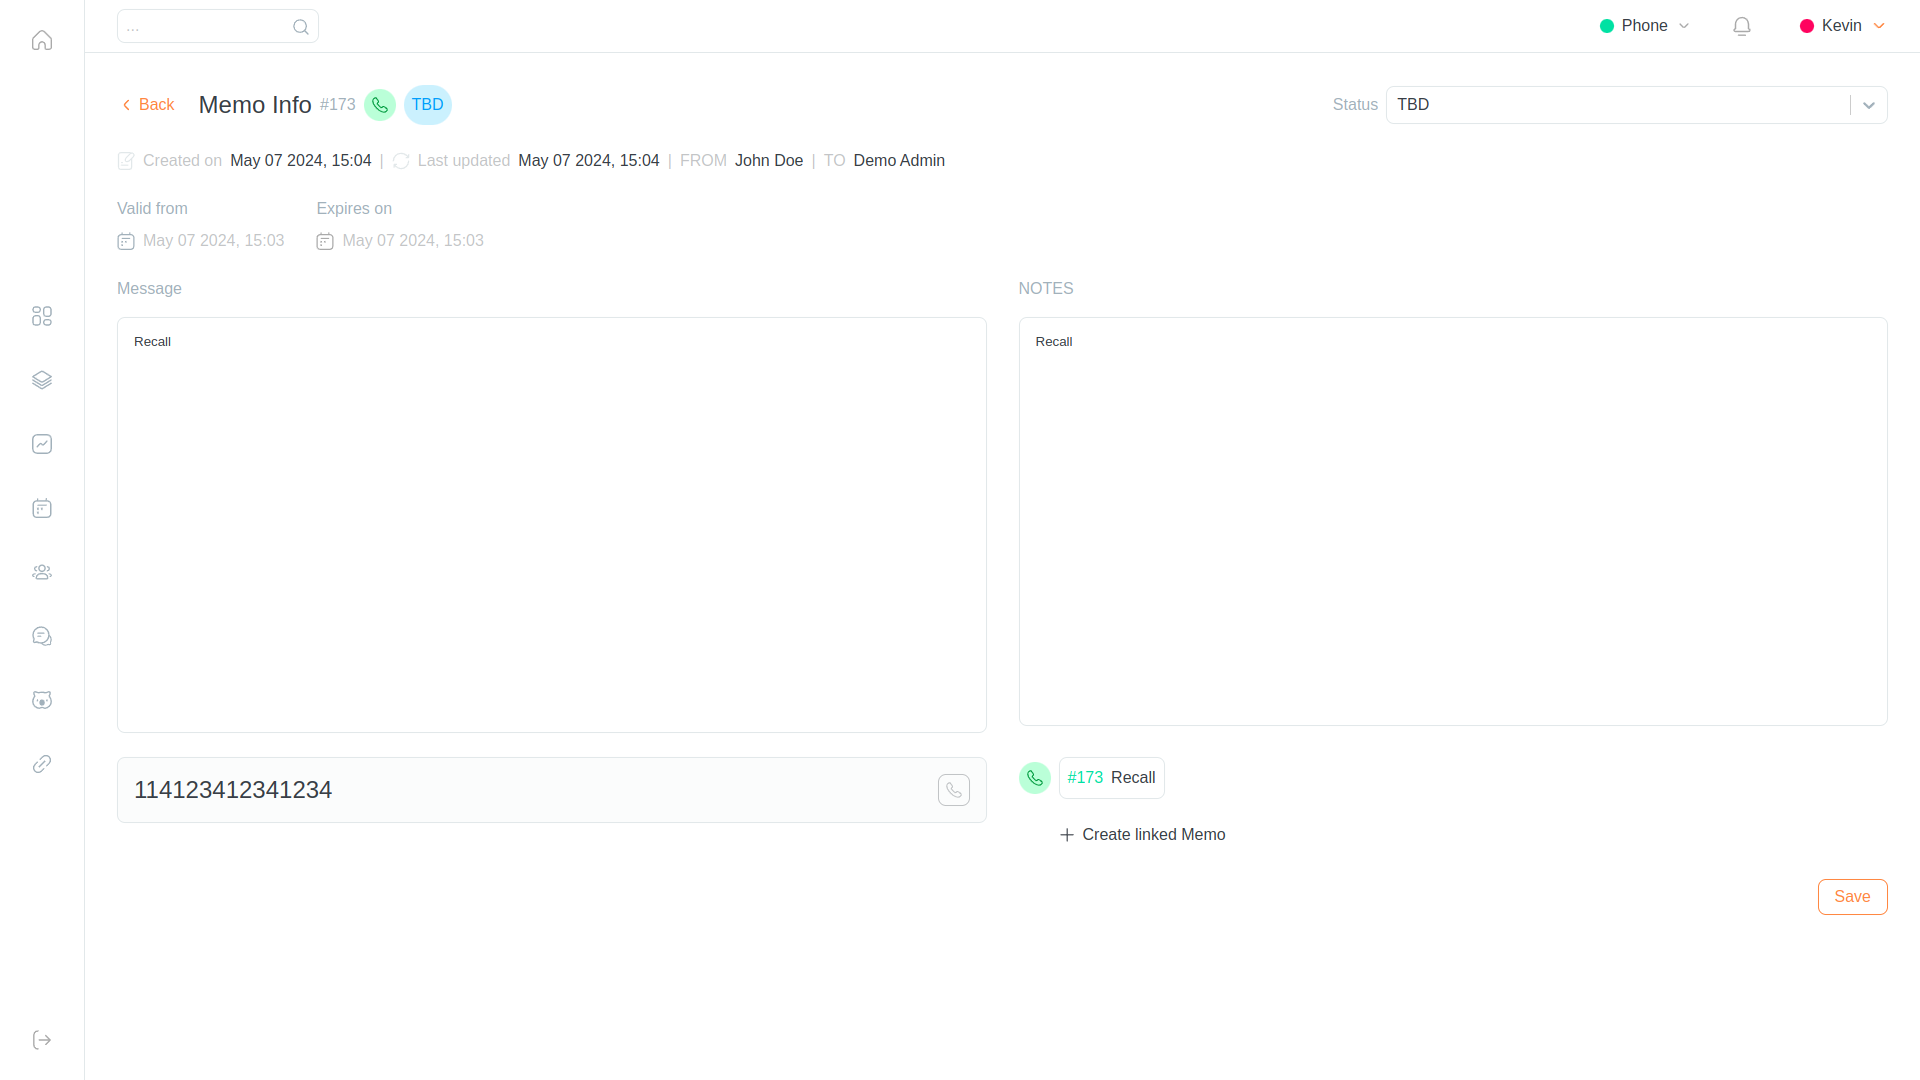
Memo Editor
Memos can be edited in different parts, depending on the ownership (Assigned to the Memo creator). If a user is the Owner of a Memo, they can modify the "Message" part of the Memo, as well as their status. If the user is the receiver of the Memo, they are able to modify the Notes section.
Both are allowed to edit the status of the Memo, and to create a linked Memo by using the button at the botton of the page.
Memo Creator
The Memo Creator can be accessing by clicking on any of the "Create Memo" buttons. From here, Agents or Supervisors can create Memos and send them to their recipients.
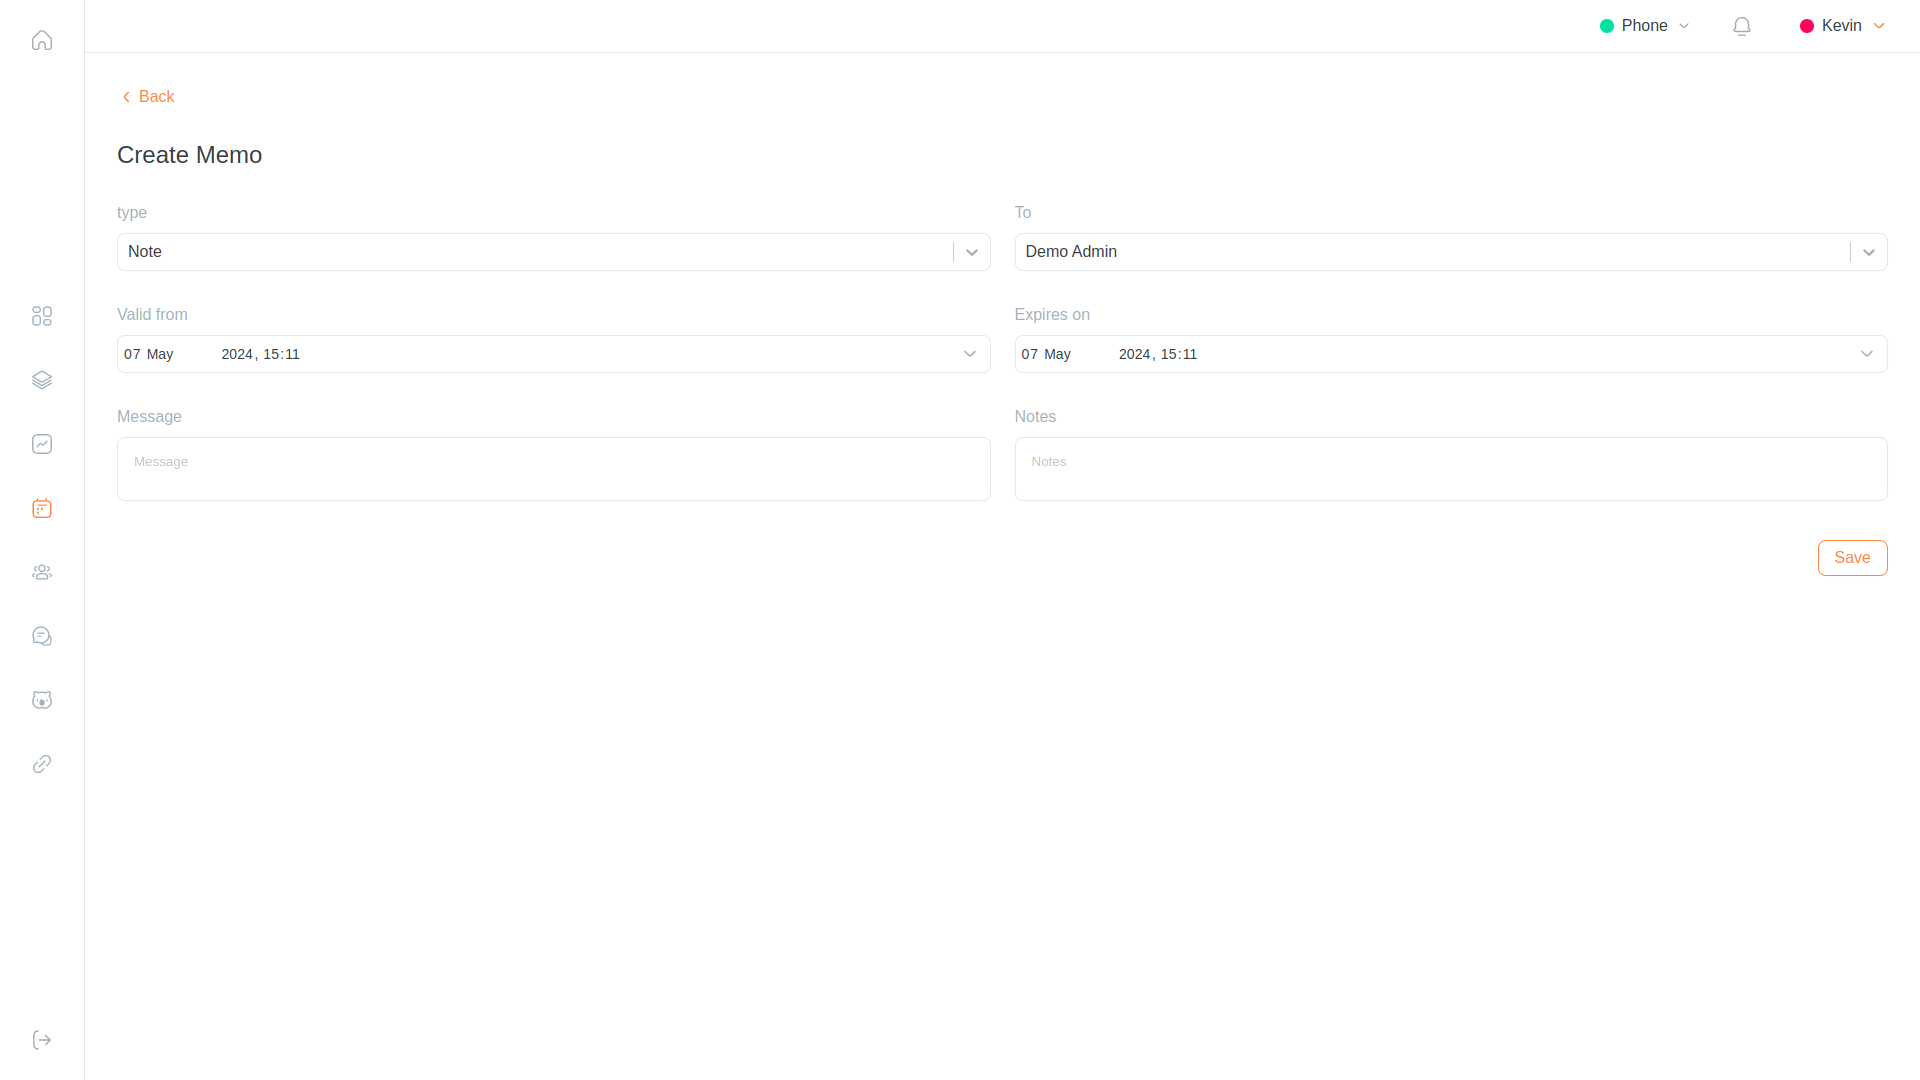
Here, the user can create Memos adding notes and a message, while also picking the recipient and type of memo they want to create, as well as the validity and expiration dates.
Keyboard Shortcuts
| Action | Shortcut | Description |
|---|---|---|
NAVIGATION_OVERVIEW |
|
Navigates to the Overview page |
NAVIGATION_INTERACTIONS |
|
Navigates to the Interactions page |
NAVIGATION_CONTROL |
|
Navigates to the Control page |
NAVIGATION_CALENDAR |
|
Navigates to the Memo Calendar page |
NAVIGATION_CLIENTS |
|
Navigates to the Clients page |
TOPBAR_PHONE |
|
Toggles the Softphone panel |
TOPBAR_NOTIFICATIONS |
|
Toggles the Notifications panel |
TOPBAR_STATUS |
|
Toggles the Agent Status panel |
OVERVIEW_START_WORK |
|
Toggles the Start/End work button on the Overview page |
CONTROL_PAUSE_UNPAUSE |
|
Controls the Pause/Unpause function on the Control page. |
CONTROL_CHANGE_AMEND |
|
Controls the Change/Amend pause function on the Control page. |
CONTROL_JOIN_SELECTED |
|
Joins the selected queues on the Control page. |
CONTROL_LEAVE_SELECTED |
|
Leaves the selected queues on the Control page. |
Softphone Keyboard Shortcuts
Here are the keyboard shortcuts for the Softphone feature in QueueMetrics:
-
Press
Enterwhile typing in the input box: Dial a number. -
Ctrl + e: Hang up the current call. -
Ctrl + +: Add a new session. -
Ctrl + a: Answer an incoming call. -
Ctrl + b: Access the Transfer panel.
Softphone System Parameters
To customize the Softphone experience, you can configure the following system parameters:
-
qap.answer_src: Specifies the source path of the answer tone audio file. -
qap.hangup_src: Specifies the source path of the hangup tone audio file. -
qap.dialtone_src: Specifies the source path of the dial tone audio file. -
qap.ringtone_src: Specifies the source path of the ringtone audio file.
These parameters allow you to tailor the audio and behavior of the Softphone to your specific needs.
Debug Page Activation
This section explains how to enable the debug page for issue diagnosis or support purposes. The debug page provides valuable information for troubleshooting.
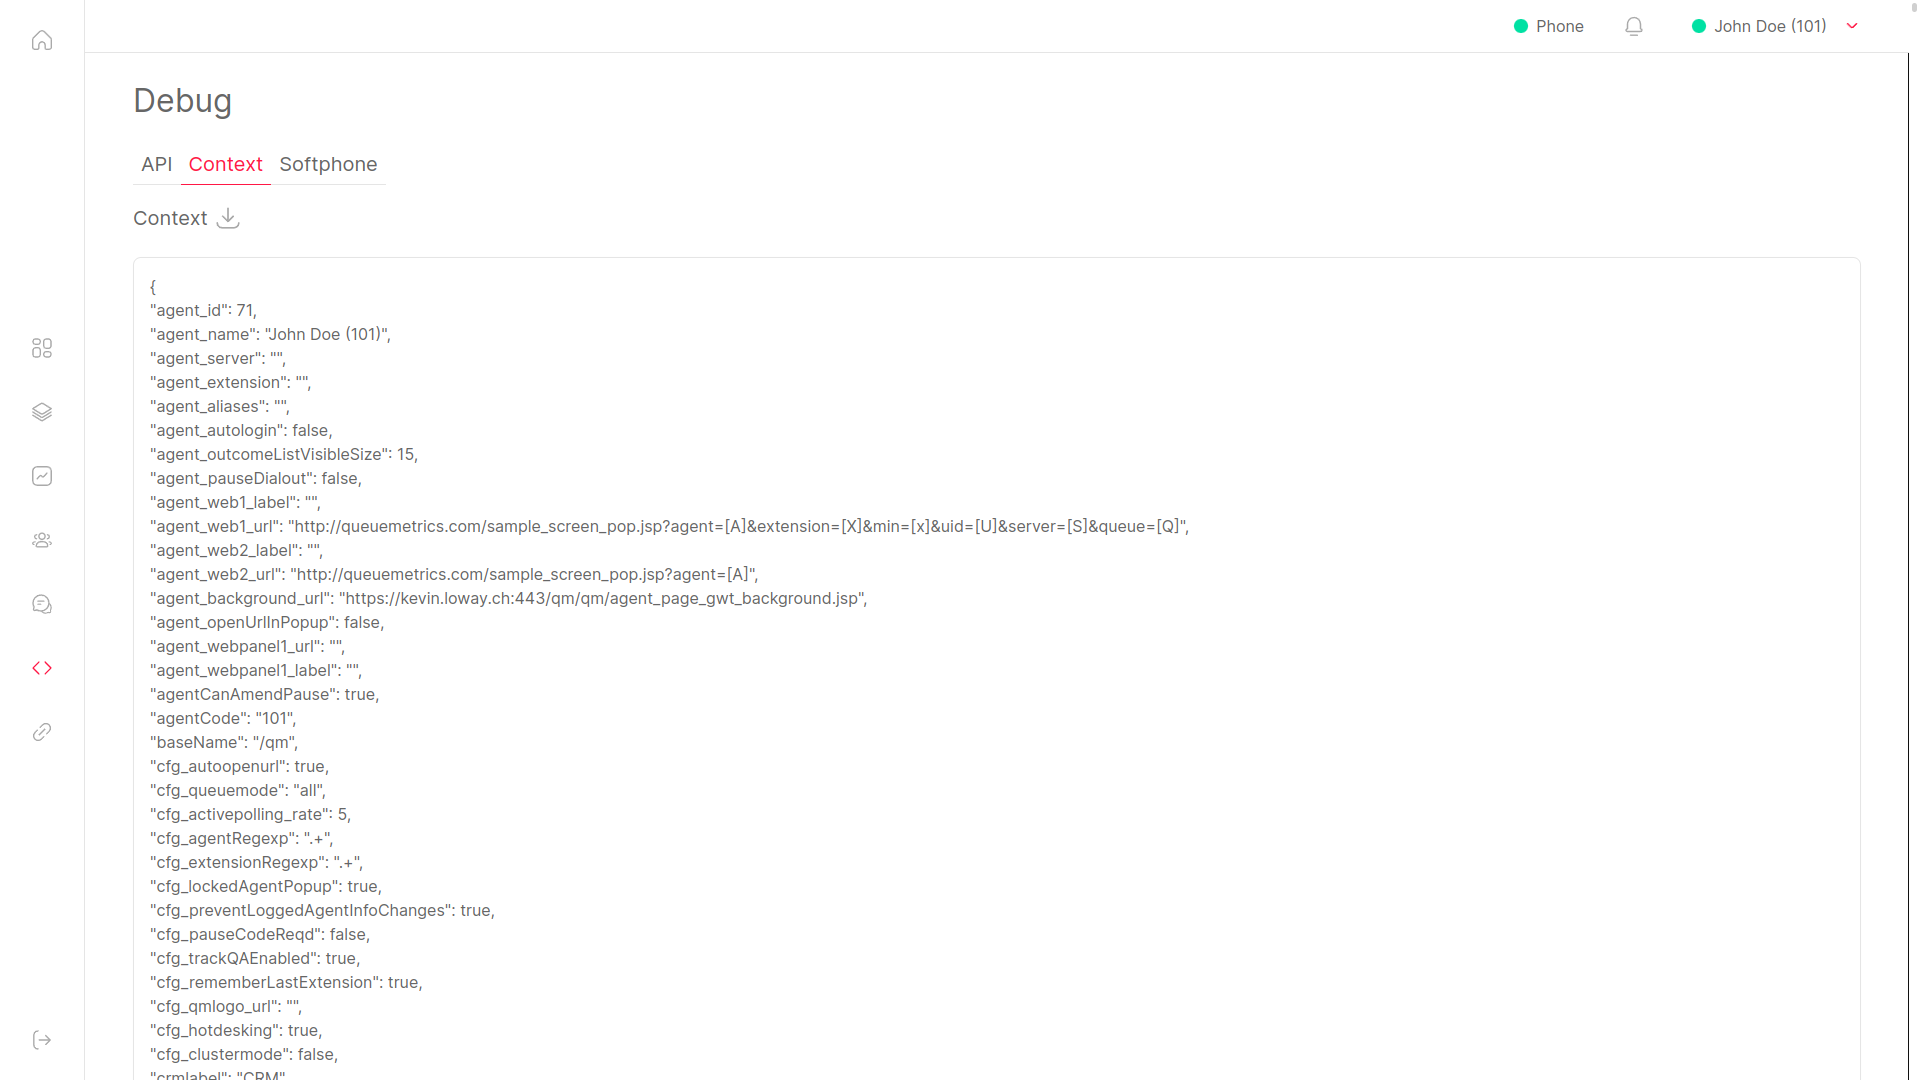
To enable the debug page, follow these steps:
-
Open the QueueMetrics agent page in a browser.
-
Modify the URL by adding
&debug=truejust before the "#" symbol.
For example, if your original URL looks like this:
https://myipaddress/queuemetrics/qm_qap_load.do#/overview
Modify it to include debug mode as follows:
https://myipaddress/queuemetrics/qm_qap_load.do?debug=true#/overview
Once you’ve added &debug=true to the URL, reload the page. The debug page will now be accessible, providing valuable information for debugging any issues.
Enabling debug mode is particularly useful when you encounter problems and need to diagnose them or when seeking assistance from the support team.