Getting started with WombatDialer
Using WombatDialer is easy once you get the hang of how it works. In order to work profitably with it, there are a few prerequisites that you should be aware of:
-
WombatDialer drives one or more Asterisk PBX’s and uses them to place calls. You should have the logins and passwords of the AMI interface for these PBXs.
-
You must know the names of the trunks WombatDialer will use - they depend on the local setup. E.g. SIP/myprovider/123456 or DAHDI/g0/123456 might be valid formats to dial the number 123456.
-
When a call is started, WombatDialer directs it to some place in the Asterisk dialplan in order to be processed. So you should have a general idea of how to program your Asterisk PBX in order to execute the functionality you’re after - e.g. playing a broadcast message, recording an audio message, setting up an inbound queue. You should know where in the dialplan these actions will happen, in terms of extension and context as used by Asterisk.
In the following example, we will show you one of the simplest things you can do with WombatDialer - that is, setting up a Direct Campaign and calling a list of numbers. All numbers will be called in sequence; if any of them cannot connect, then it will be retried.
To make life easier, we will run the following example by using the free 2-channel demo key that is embedded in WombatDialer. You may want to test more complex scenarios by getting a free demo key from our website in order to test-drive WombatDialer thoroughly.
We are going to be using FreePBX in this example and assuming that the PBX is already up and running; having queues and extensions already configured.
This is our battle plan:
-
Install WombatDialer
-
Set up WombatDialer
-
Create a list of numbers to be called
-
Create a new campaign
-
Create reschedule rules for our campaign
-
Run your first campaign
-
Run a report on the campaign
Install WombatDialer
We will be installing the dialer on the same box as your PBX is. Please note that WombatDialer is NOT meant to be installed on an internet-accessible system.
Installation is very easy; on an FreePBX box it is enough to login as root and enter the following commands:
wget https://yum.loway.ch/loway.repo -O /etc/yum.repos.d/loway.repo
yum install wombat
A number of packages will be selected and installed on your local system. This may take a while.
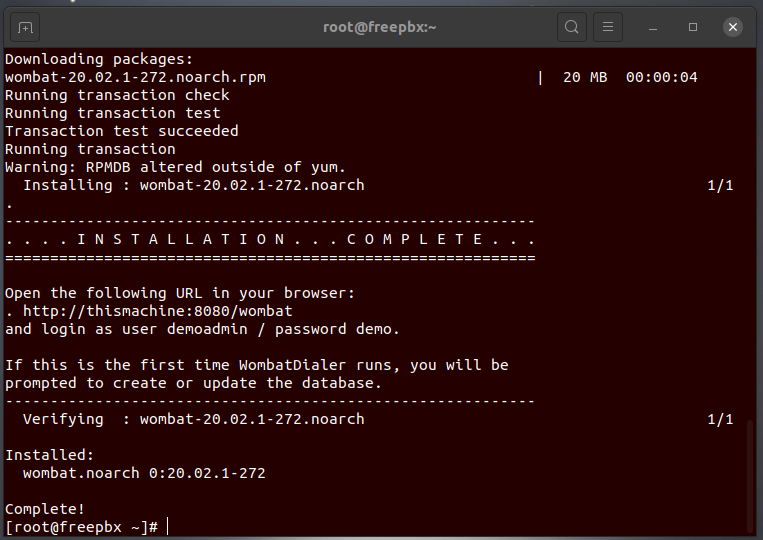
When done, go to http://serveraddress:8080/wombat and follow the instructions to create the database.
When done, login as demoadmin password demo by clicking on the Users icon on the top-right.
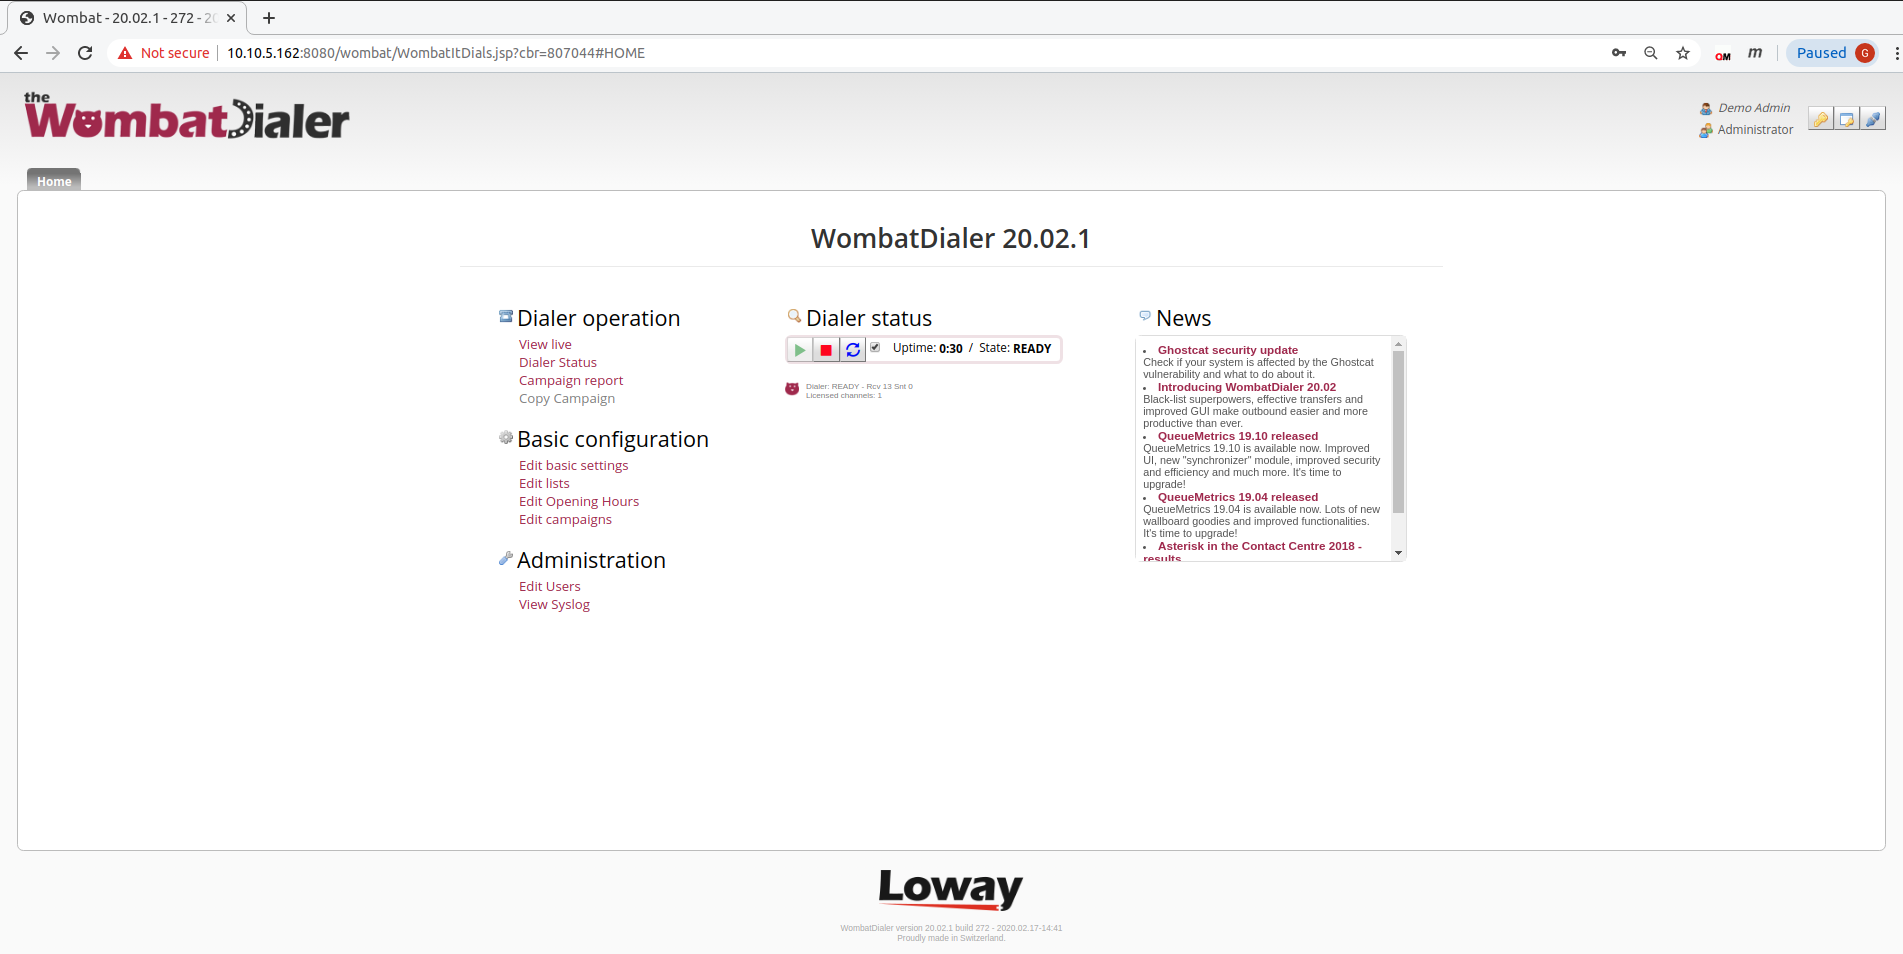
If all goes well, you should be presented a screenshot like the following one:
Set up WombatDialer
Inside WombatDialer; after logging in, click on "Edit basic settings" and add a new Asterisk Server like:
-
Server description: MyPBX
-
Server Type: Asterisk AMI
-
Address: 127.0.0.1
-
AMI port: 5038
-
Login: cxpanel
-
Password: cxmanager*con
| Near the "Server Type" you will find a "plug" icon. Use this button to test the AMI connection with your PBX. |
| in this example, we use the default AMI user for FreePBX - it would be generally better to create a new user specifically for WD. |
Now we create a new trunk. This will be used to dial numbers out. We might be using a SIP trunk, a local channel or whatever suits you. For the moment we use the default format used by FreePBX, so that numbers will be composed as if they were dialed on a local extension.
-
Asterisk server: MyPBX
-
Trunk name: MyTrunk
-
Dial string: Local/$\{num\}@from-internal/n
-
Capacity: 10
| Near the "Dial string" you will find a "plug" icon. Use this button to test the Trunk. |
Now we create an end-point, that is a destination for calls that are successfully answered. In our example the EndPoint will be a queue where extension 201 is waiting to be connected with the customer.
-
On server: MyPBX
-
EP Type: Queue
-
Description: My End-Point
-
Max Channels: 10
-
Located at [extension]: 999
-
Located at [context]: from-internal
-
Queue name: 999
| Near the "Located at [extension]" you will find a "plug" icon. Use this button to test the context that you are using. |
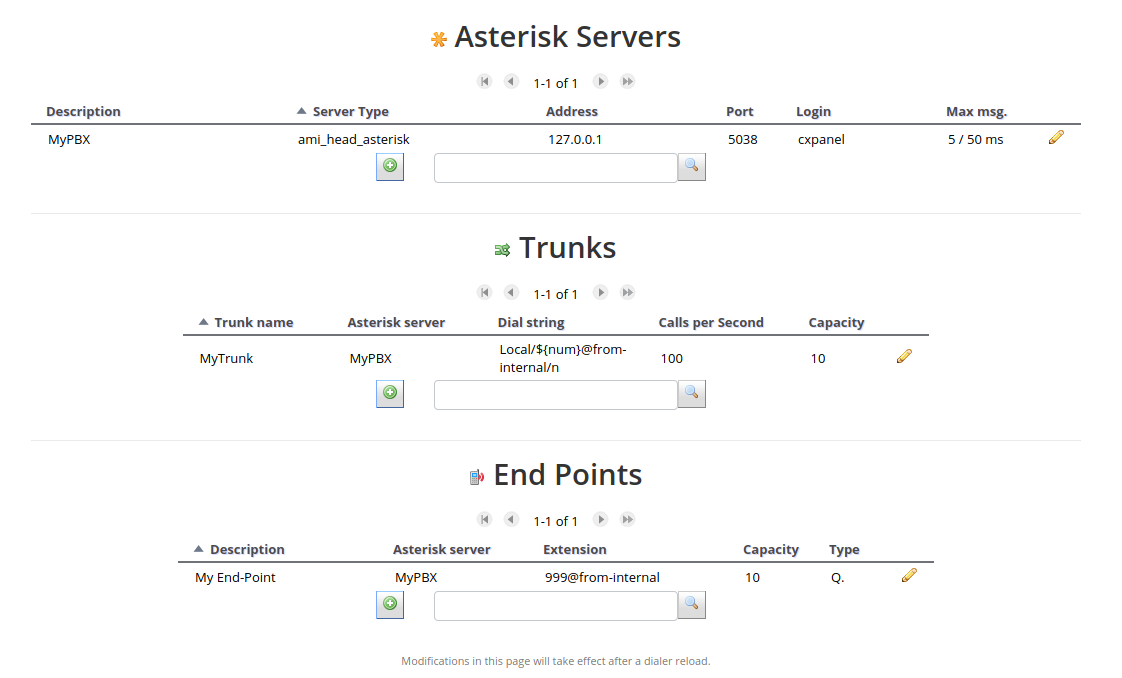
By the end of the configuration, your page should look like the following one:
Create a list of numbers to be called
Now go back to the main page, click on "Edit lists" and create a new list called "TestList". The list has no settings, just a name.
Select the list just created on the left and then press "+" on the "Numbers for list" control. From here we add numbers - you may enter any numbers you want, as well as Attributes.
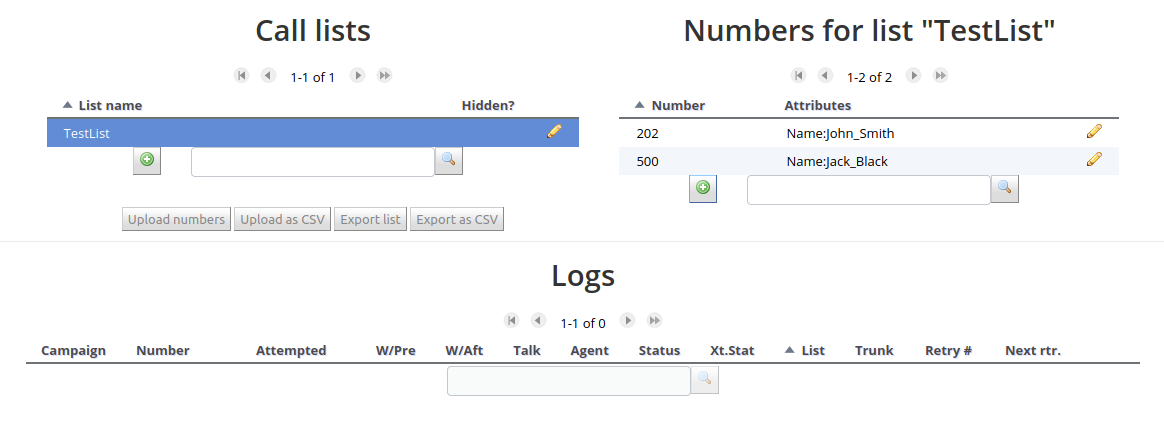
You may want to add local extensions and remote channels - WD will work just fine. In our example, we added a local extension and a non-existent local extension, in order to display what WD does when a number cannot complete.
For real-life usage, you may prepare a CSV file with your favorite spreadsheet and upload thousands of numbers at once.
Create a new campaign
Let’s go back to the home page and click on "Edit Campaigns"
Add a new campaign by setting the following parameters:
-
name: TestCampaign
-
status: RUNNABLE
Then save it and select it; add the trunk, the end-point and the list you just created.
It is important to notice that, once you add a trunk or an end-point to your campaign, to change it with another one you need to add the new one and then remove the old one using the edit panel (the pencil icon). If you’re adding lists or reschedule rules instead, you can change them directly by selecting a new rule or list in the edit panel.
At the end of the configuration the campaign will look like:
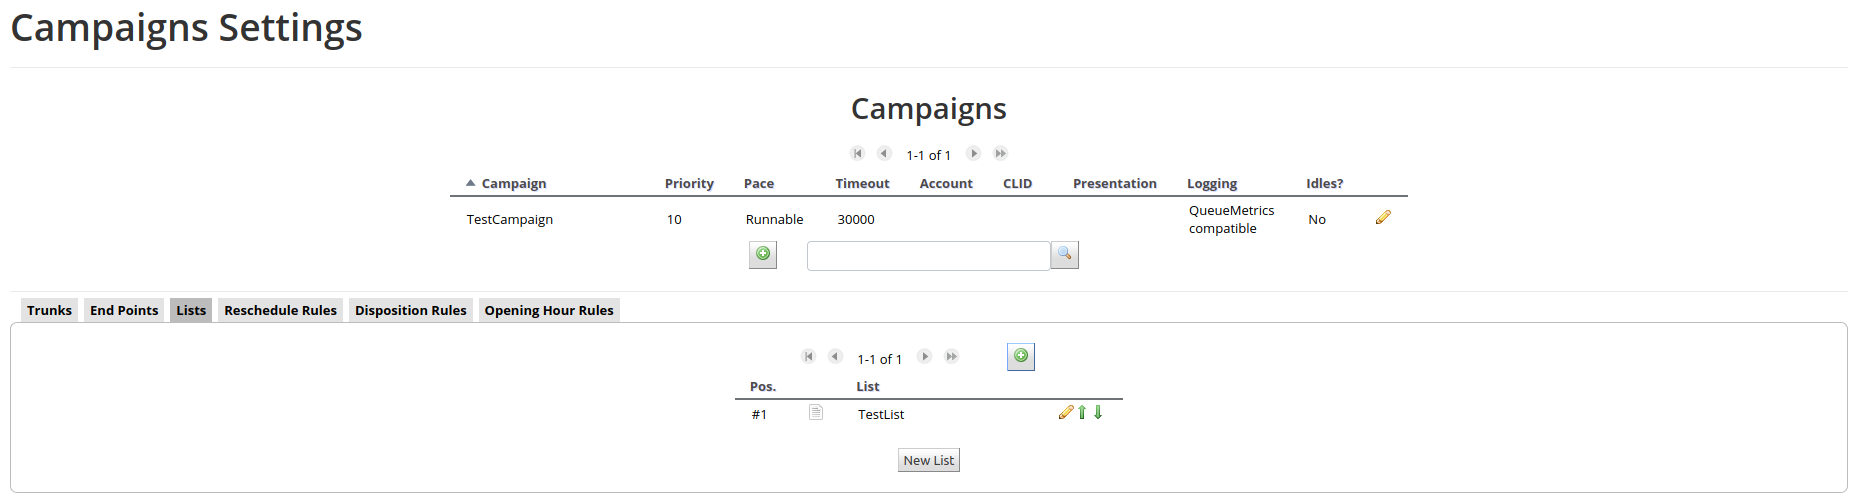
Campaigns have many options you can set to control their behavior - for example, you can set a caller-id, or the time period they are supposed to be active it, or how their results should be logged and notified. A detailed description is available on the Campaigns chapter.
Create reschedule rules
While the campaign is selected, take a second to add reschedule rules. Basically they tell WD what to do in case a call does not go through. You will typically want to handle at least the following cases:
-
RS_REJECTED: the network could not place the call
-
RS_BUSY: the number dialed is currently busy
-
RS_NOANSWER: the number dialed does not answer
For each case, add a new reschedule rule. Just enter a time in seconds after which the call is to be redialed, and a maximum number of retries.
You would expect to have something similar to the following example:
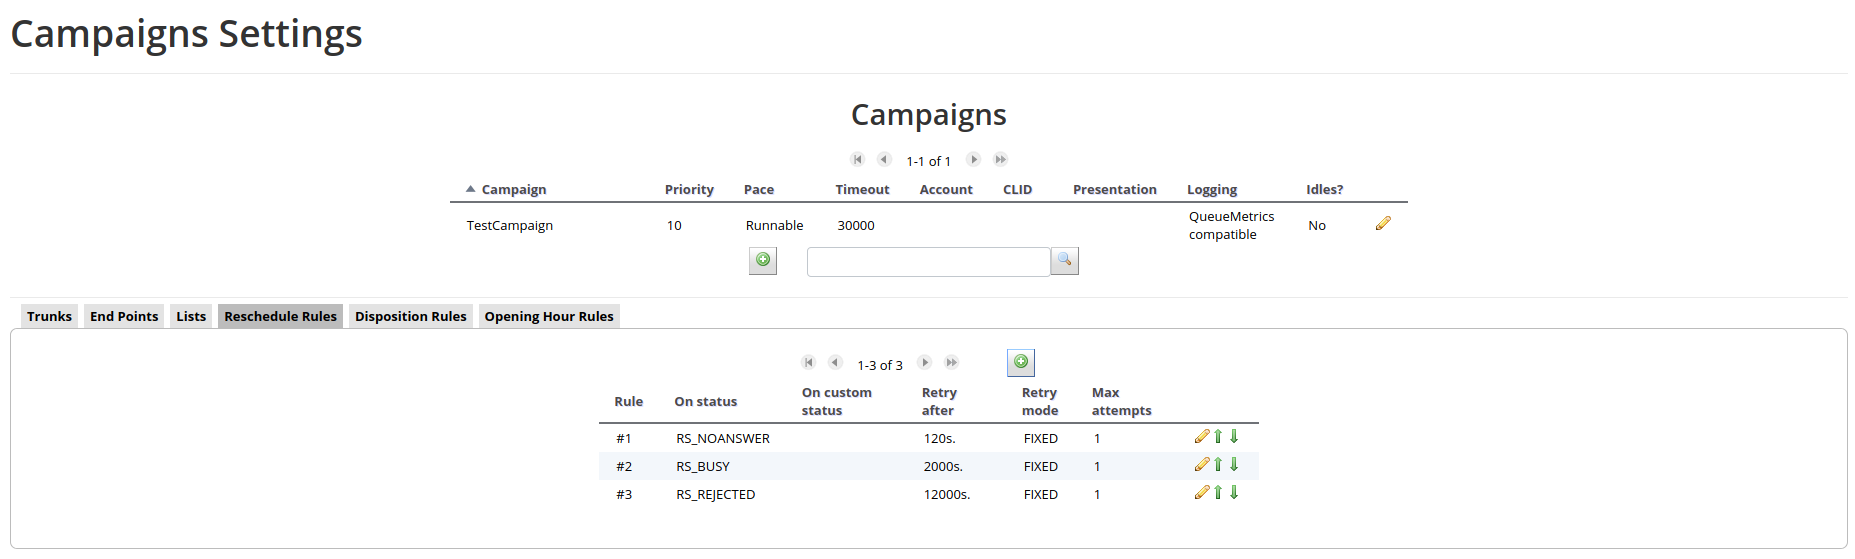
Note that, for each rule, you may have a different retry delay and a maximum number of retry attempts that is different based on the status encountered.
A detailed explanation of completion codes and how reschedule rules interact can be found at Reschedule Rules.
Run your first campaign
Now go back to the home page and start the dialer by clicking on the "Play" icon under "Dialer status". After a few seconds, click on the "Refresh" icon to confirm WD is up and running:
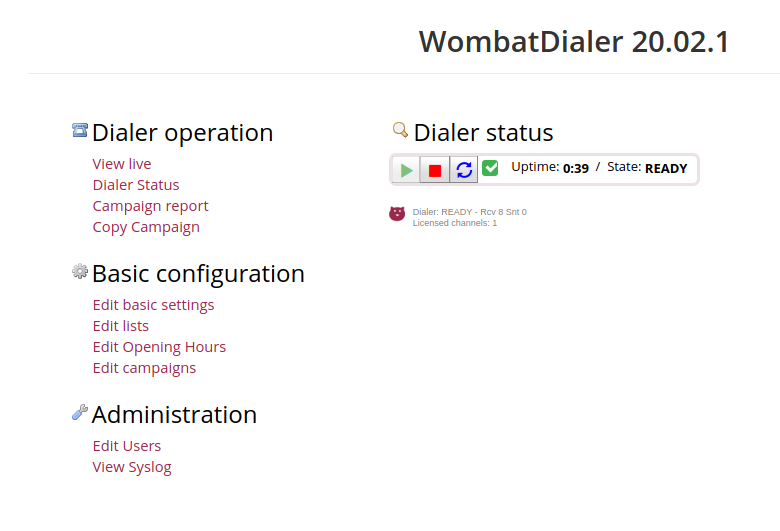
If you want to see what the dialer is doing without manually reloading, you may want to tick the box close to the Reload icon to enable automatic refresh.
Click on the "View Live" page. From the "Available Campaigns" box, select your new campaign and run it by clicking on the "Start" button by the bottom of the page:
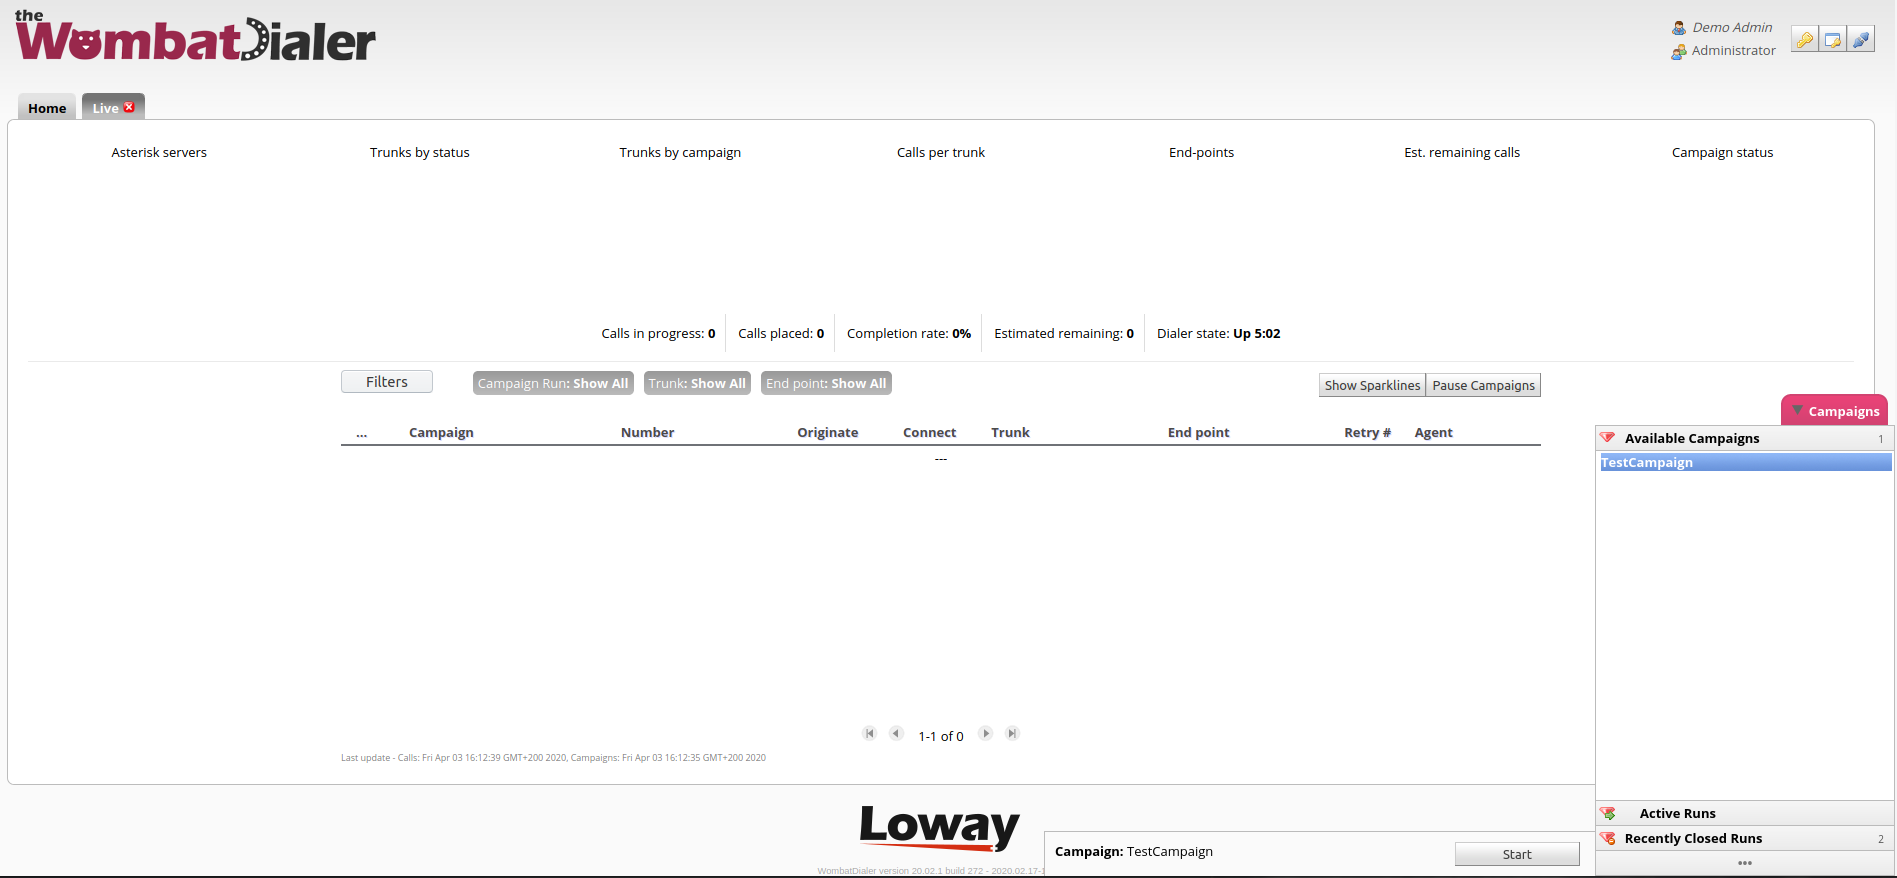
While the campaign is running, you will see WD dialing calls. Please note that while WD is running, your PBX can be used normally. The same campaign can be run only once - you cannot start it anymore when it’s running, but you will be able to run it again when it finishes.
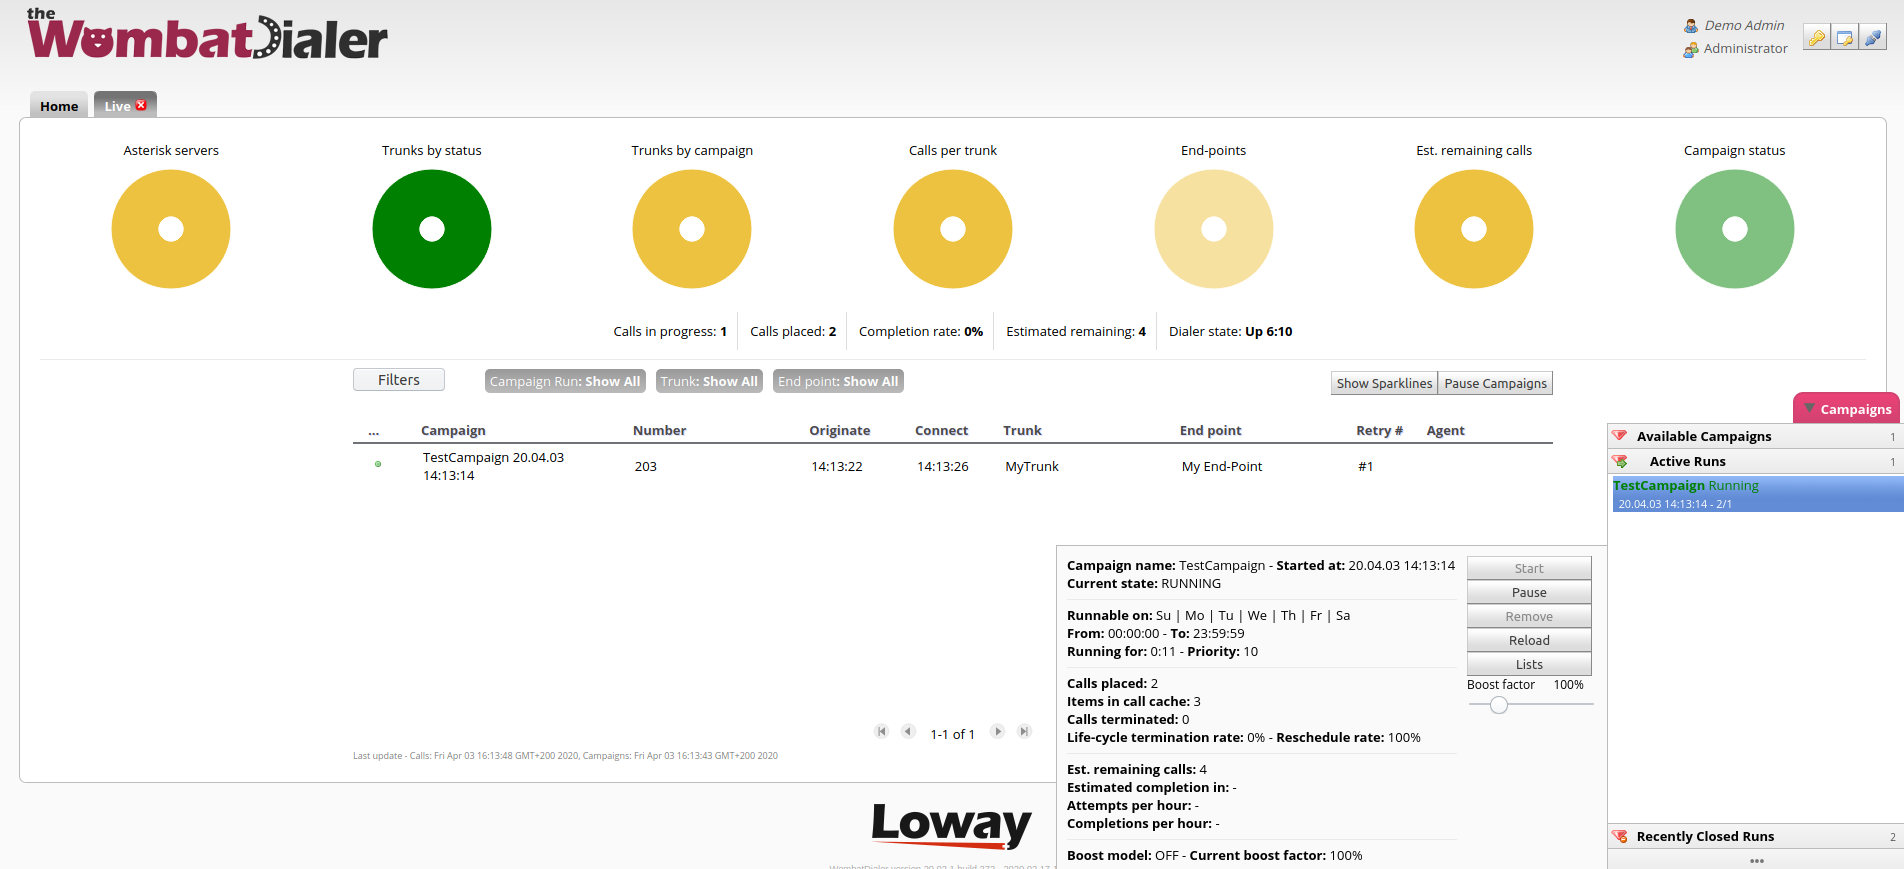
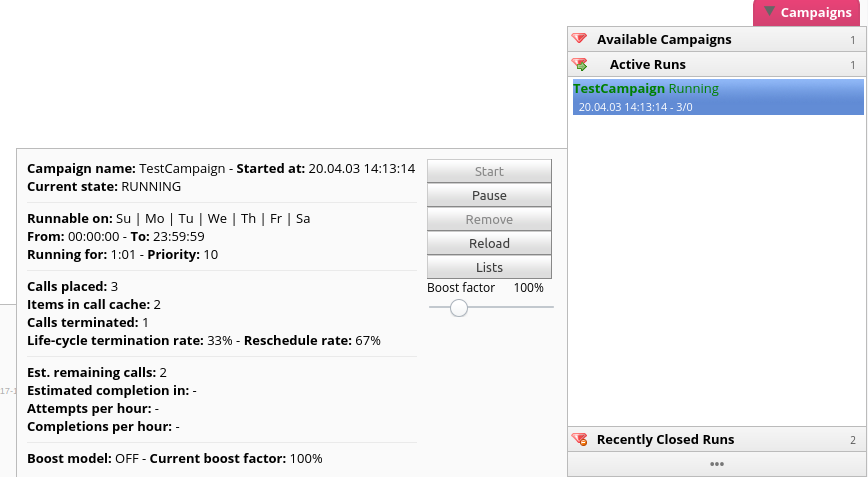
If you select the running campaign from "Running Campaigns", you will see its completion statistics and expected termination time (as soon as it has completed enough calls to provide an estimate).
You can also click on a live call to see its details.
When the campaign completes, its run is placed in the "Recently closed" section and you are able to start it again.
Run a report on your campaign
From the home page, click on "Campaign reports". Click on "TestCampaign" and make sure your run is selected. Then press ">>>".
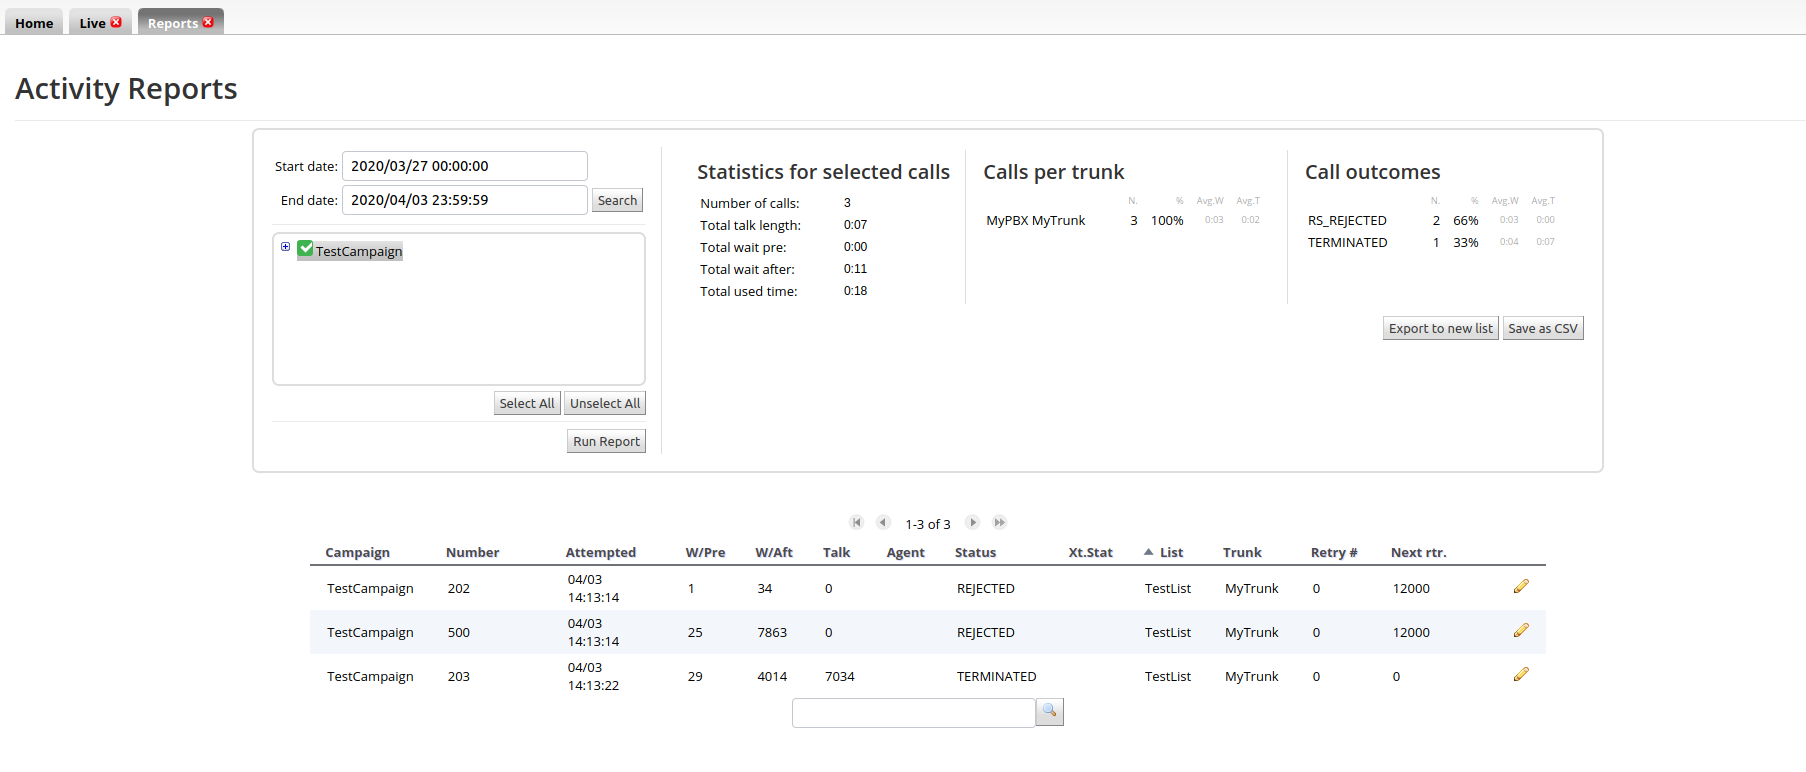
You will see statistics about the runs included, trunk usage and status codes; and details for every attempt made.
If you want, from here you can create a new list that only contains calls for which the final status was not successful. Click on "Export to new list", select the runs you are interested in and the final statuses you want to include, and enter a name for your new list.
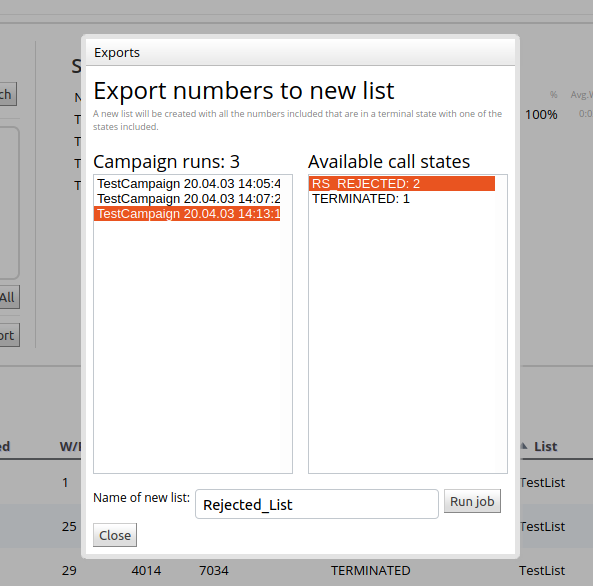
This way you can save calls to be retried at a later date.
Where to go from here
This manual provides a detailed description of the concepts involved in WD and how it is run and administered, plus a complete API reference.
Of particular interest can be the section named "WombatDialer Cookbook" that includes a number of recipes that cover different real-world scenarios and show common usage patterns.